Tips For Getting A Salon-Worthy Eyebrow Wax At Home
We may receive a commission on purchases made from links.
We tend to assume that the first thing someone sees when they look at us is our eyes, but maybe it's our eyebrows. It's been said that eyebrows make up the entire face, so it's normal to strive for a cleaner look through perfectly waxed eyebrows. However, getting your eyebrows done every couple of weeks can be expensive, so learning how to wax your eyebrows at home can save you some money. While waxing your eyebrows by yourself can be intimidating, as there are many waxing mistakes you want to avoid, you may end up preferring to DIY than going to a professional once you have enough practice.
If you've tried using pre-made waxing strips from brands like Sally Hansen, you know they can be hard to wax the brows with. They're ideal for a light clean-up between the eyebrows or close to the tail, but they're never thin or long enough to place underneath the brow. Using hot wax can be challenging at first as you figure out how much wax to use and how to apply it correctly, but it will give you the best salon-worthy eyebrows in the end. Our tips will guide you to feel more comfortable and confident when waxing your eyebrows at home. Remember to be patient and take your time; you'll be a pro after a few sessions.
Choose the right wax for your skin type
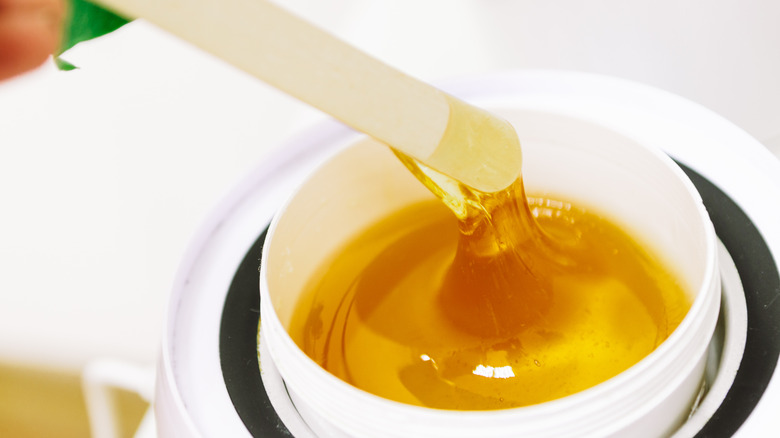
Most eyebrow waxing professionals either use hard wax or cream wax. Hard wax is easier to use and better for sensitive skin. The hard wax applies smoothly on the skin when it's melted and hardens as it dries. You don't need to remove the wax with a strip because it acts as a strip when it sets on the skin. While it's suitable for sensitive skin, the hard wax won't pull all of the hairs on the first removal, so it may need to be applied a couple of times, which can irritate the skin.
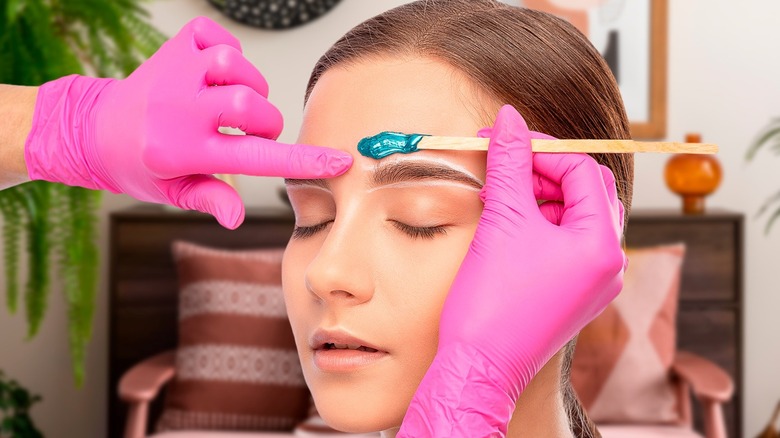
On the other hand, cream wax is the traditional wax used for eyebrows. It's a thinner, runny formula removed with a wax strip. Cream wax is applied thinly on the hairs but sticks to every strand. So, when the wax is removed, it's excellent at pulling out all the hairs it's attached to. Usually, one application is enough to get all of the hair. The stray hairs can always be removed with tweezers. However, warm cream wax stays hot throughout the application, so you must be careful if you have sensitive skin.
Always test the temperature of the wax on your wrist to ensure it's not scorching before applying it to your face. Warm wax is ideal; hot wax can burn your skin. Allow the wax to cool once it's fully melted.
Gather all of your products before waxing
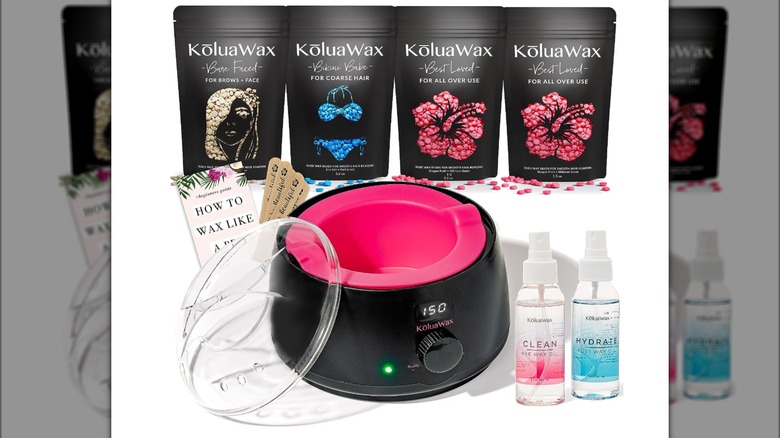
Most wax kits will have everything you need to prep, wax, and care for your eyebrows. They should include a prep-waxing cleanser or oil, the wax itself, a wax warmer, wooden spatulas, and post-wax soothing gel or lotion. However, if you purchase solely the wax warmer and your choice of cream or hard wax, you should buy the other products separately. Wax kits can be expensive; spending a little more is best for a good-quality kit. Cheaper kits contain all the products you need but sometimes won't be the best for your skin, especially if you're more sensitive.
GiGi's Brow Waxing Kit is an excellent hard wax kit from Ulta for $39.99 at the time of writing. It includes wax beads, wooden spatulas, brow razors, brow stencils, a wax warmer, and small and large edge applicators. The wax kit is safe for sensitive skin types but doesn't come with a pre-cleanser or post-wax gel, so you'll want to buy those separately. If you prefer cream wax, GiGi has a cream wax kit with the essentials, including prep and post-wax treatments. The Mini Pro Waxing Kit is available at Sally Beauty for $59.99. Customers who bought the cream wax kit claim the wax is stickier than usual, so it's best to apply it carefully to the skin to prevent getting it everywhere. Both kits are perfect for beginners looking to wax their brows at home.
Create a brow stencil
Before you apply any wax to your eyebrows, it's vital to prep them to avoid irritation. You want to ensure you have a cleansed, makeup-free face. Washing the face allows the wax to stick better and remove more hair. Using a spoolie, brush the hair upward and trim against the brow, not going down the brow. You want the hair to be even straight across, so you can cut one strand at a time to ensure you don't have a patchy look.
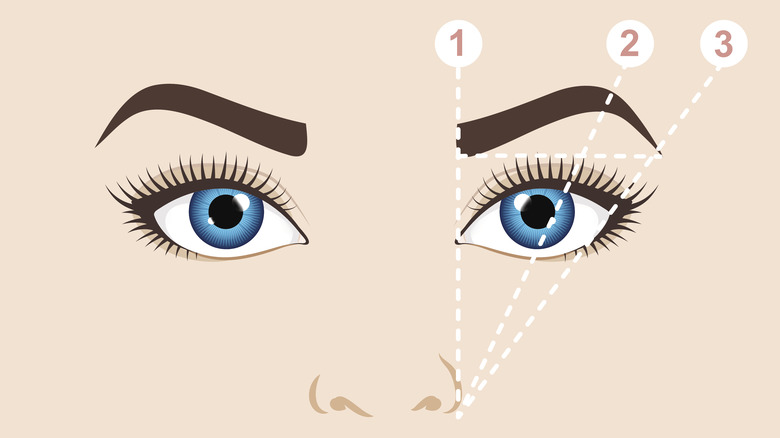
Next, you want to measure and outline your brows. You will make three distinct points on the brow, using your nose as the center point. Grab one wooden spatula and place it in the center of your nostril, laying it vertically up to the brow. It should hit the starting point of the brow; make a mark to indicate whether it needs to be waxed or not. Then, find the end of the brow by laying the wooden spatula at a 45-degree angle from your nostril to the corner of your eye. The spatula will sit where the brow should end. Finally, find the arch by laying the spatula in the center of your nostril and over the eye's pupil to hit the highest point of the brow. Make your marks, connect the dots, and remove the hairs outside of the measurements.
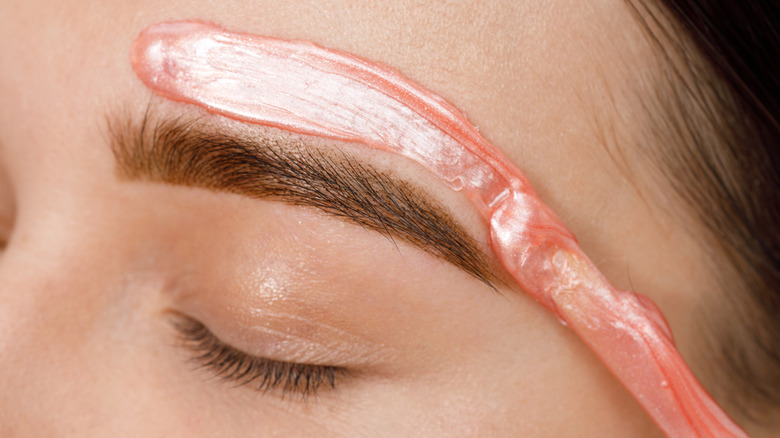
Pull the wax against the direction the hair grows
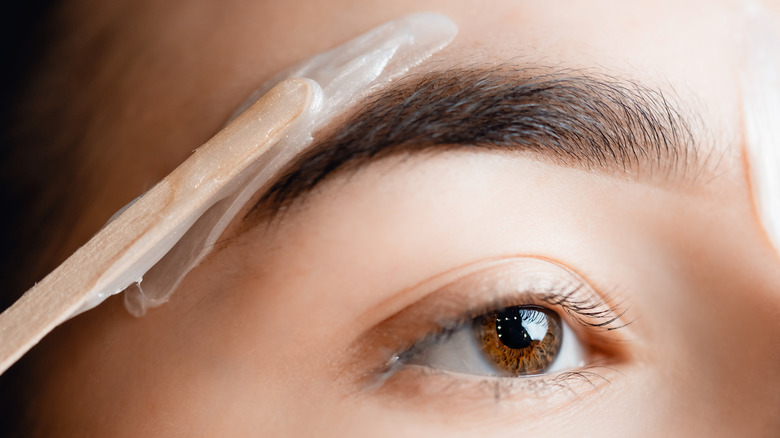
Once you've prepped, check your wax to ensure it's fully melted with a thick, runny consistency. If it's ready, dip your wooden spatula in the wax, picking up a small amount. Apply the wax to the hair you want to remove first, spreading it in the direction the hair grows. Try to keep the application thin and even across the hair. For first-timers, go at your own pace by starting in small areas. Hair won't grow back quickly if you make a mistake, so take your time.
Then, place one of the cloth strips over the wax, applying pressure toward the hair growth. Smooth the strip and pull the strip in the opposite direction of the hair growth. Pulling your skin back with the opposite hand before pulling the strip will reduce the stinging from the hair being removed. Repeat the steps for the rest of the areas around your brow.
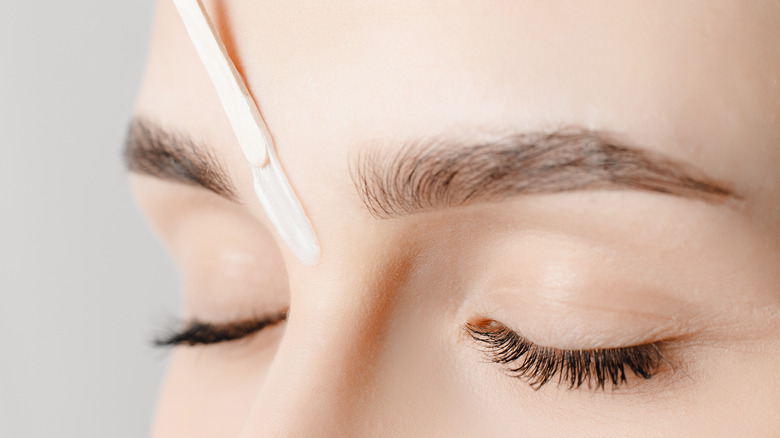
Remove stray hairs with tweezers once you've waxed as much as possible. Be careful not to over-pluck; always stay outside of the measurements you made.
Avoid exercising and wearing makeup for 24 hours

After waxing and tweezing, add soothing gel or oil to a cotton pad and run it over your waxed skin to relieve the area. The calming gel will help reduce redness and prevent waxing pimples. If you have sensitive skin, opt for natural soothing gels without fragrance, such as aloe vera. Store your aloe vera in the fridge to keep it cold before applying it to your skin.
Like most waxing procedures, aftercare is essential, especially for sensitive skin. You want to keep your eyebrows clean and dry for 24 hours. Avoid putting on makeup and harsh skincare products like exfoliants. Use sunscreen with non-comedogenic ingredients that won't clog the pores. In addition, avoid sweating as much as possible for 24 hours. Go on a light walk, but don't do any heavy exercises that will make you sweat; it will further irritate the skin.
To prevent waxing pimples, you can continue applying the soothing gel up to three days after your waxing session. It'll help heal the skin, but you should be able to follow your skincare routine, apply makeup, and go to the gym after 24 hours.
Always refer to the waxing kit's instructions
One significant tip to remember when waxing your eyebrows at home is to follow the instructions on your kit or products closely. Practice makes perfect, and you'll get better and faster at waxing over time. However, in the beginning, always follow the instructions outlined to you. While looking up tips can be handy, waxing kits always have clear instructions on using every tool provided properly. Some kits will have picture instructions visually showing how to apply and remove the wax.
Healthline explains that it's possible to develop an infection after waxing at home, as your freshly exposed hair follicles can be exposed to various kinds of household bacteria. It's especially important to follow the outlined instructions on your waxing kit or products to reduce your chances of developing folliculitis (infection of the hair follicles) and ingrown hair cysts. You can further reduce the risk by waxing in a clean and sanitized environment.
Never mix waxing with acne medication
Waxing can be harsh on the skin, especially when using intense acne treatments. It's best to avoid waxing when using acne medication, such as Accutane or retinoids, to avoid burning your skin. Dermatologist Craig Kraffert tells Allure that retinoids "can contribute to increased skin fragility," and acne medications in general can make your skin extremely sensitive and therefore more prone to irritation.
Retinol is an exfoliant that helps remove dead skin cells, lighten hyperpigmentation, and increase collagen production. Waxing also exfoliates the skin when it removes hair and dead skin cells. So, combining retinol and waxing will over-exfoliate the skin and possibly remove some skin cells that you don't want to get rid of, per Golden Peach Wax Bar.
Even if you use topicals as a spot treatment only, it's best to avoid waxing. Speaking to Well + Good, board-certified dermatologist Tiffany Clay, M.D., explains, "There is a chance that you may be safe if you stop using the retinoid two to five days prior but I don't think it's worth taking that risk." Instead, aim to stop using retinoids seven to 10 days prior to waxing. Clay also recommends ceasing strong, active ingredients like lactic or glycolic acid two to five days before waxing.
Always talk to your dermatologist or aesthetician to ensure your skin is in the clear before waxing at home.