Here's How You Can Replicate Chic Marble Nail Art At Home
We may receive a commission on purchases made from links.
In a world touched by shortages, lockdowns, and rising inflation rates, financial limitations can easily keep you from trying all the fashion and beauty trends you'd like to dip your toe — or your fingernails — into (via CNN). Thankfully, many current beauty trends, including chic and intricate-looking marble nail art, can be accomplished at home with nothing but a few inexpensive tools, a little bit of patience, and some gentle guidance.
Co-founder of the nail polish giant OPI Suzi Weiss-Fischmann has stated that "caring for your nails and applying color is an act of self-care," as reported by Forbes. Say no more, Suzi. Frankly, everyone could use a little extra self-care, and DIY nail art is the perfect way to indulge. Luckily, doing your own marble nail art at home is a trend you should try, unlike the press-on nail trend making the rounds on TikTok. Here is everything you need to know, including the necessary tools, color options, and steps to give yourself a stunning, trendy marble nail art manicure at home.
Tools and supplies for marble nail art
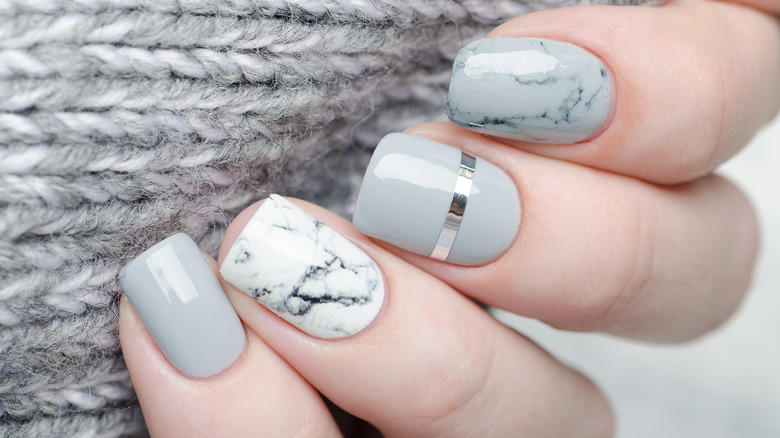
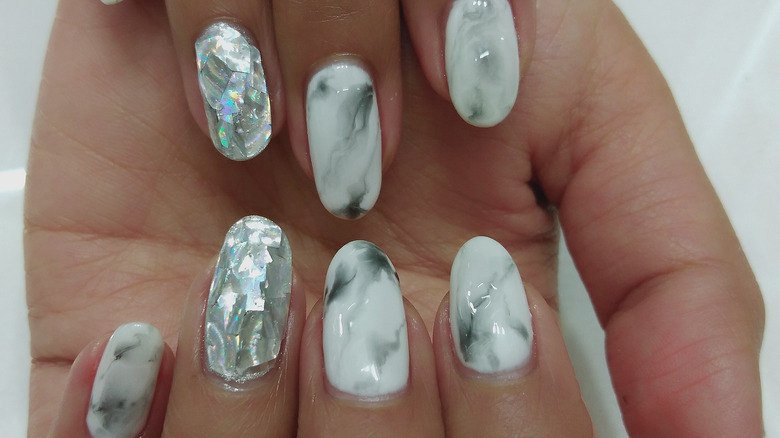
Before you start your marble nail art manicure, make sure you have all the tools and supplies you'll need. First, select a base color. For a classic marble look that replicates the real thing, choose a high-quality opaque black or gray hue (via Tino Stone). Next, find a color one to two shades lighter than your base for adding texture. For details that pop, select a bright white. Finally, you'll need a metallic color, like the Sally Hansen Foil Nail Polish in Steel a Kiss, and a clear top coat. Keep it classy with metallic silver, gold, or rose gold.
Applying the polish will require a couple of small paint or makeup brushes, plastic wrap, and nail polish remover. You'll also want to have a moisturizing hand lotion available for aftercare, such as Jergens Lavender Body Butter and Hand Lotion. One brush should be the size of an eyeliner brush and the other comparable to a dense brush you'd use to pack on eyeshadow pigment. When selecting a nail polish remover for cleanup, consider one that consists of 100% acetone for quick and powerful removal. According to Self, acetone remains the most effective way to remove nail polish from your nails and skin, though it can be quite drying.
Marble nail art technique
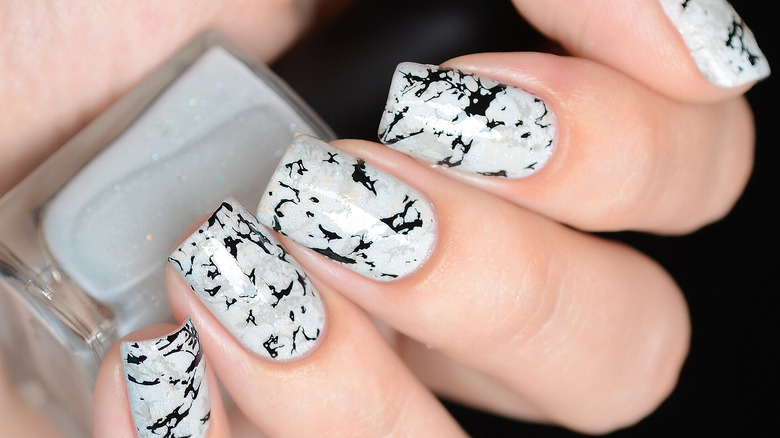
Once you've located all your polish and tools and laid them out in the area where you'll be painting your nails, apply two coats of your base color. If you struggle with nail ridges, you may wish to prep your nails with a little OPI Ridge Filler beforehand. While the second coat is still tacky, crumple a piece of plastic wrap into a ball. Pour a drop of the base color and a drop of the texture color onto a clean, disposable surface. Dip the plastic wrap ball into the mixed color and then dab it onto your nails to create a textured appearance. Similar techniques can be used with plastic wrap to create all kinds of creative textured looks with polish or gel builder, like this crinkled style posted by TikTok user @ilysmnails.
Using your smaller brush, trace over the textured lines you created with your detail color. Then, clean the brush with nail polish remover and dip it into your metallic polish. Use this color to add accents on and around the detail lines you added. Once you've achieved a look you like, use the larger brush dipped in nail polish remover to clean up any polish on your skin. Apply a top coat and once it has dried, moisturize with hand lotion, and enjoy your work of art.