How To Apply Boob Tape So It Actually Stays Put All Day

From bandages and breast wraps to corsets, women have had many ways to cover, support, and prop up their breasts within the last 100 years of bra history. And bra fashion keeps evolving. Many have been creative about handling their breasts while wearing décolleté, strapless, or backless dresses where bra options are limited. As revealed in this Instagram post, reality star Kim Kardashian used gaffer tape before specially-made breast tapes were commonly available. And who knows how many more people have thought of this hack.
The first official boob tape was made in 2018 by sisters Bianca and Bridgett Roccisano, co-founders of the Booby Tape brand (via Forbes). Since then, many clothing and underwear brands have added boob tape to their product lines. Boob tapes are just what you imagine — adhesive strips meant for the breast. These tapes fill an important gap as dress designs are getting more creative, and bra designs can't keep up. While some just go braless in these designs, this is not an option for everyone.
Now, with a good boob tape and a little skill, you can support, flatten, or push up your girls in any dress. You can also create and show off as much cleavage as your dress allows. Plus, you don't have to worry about pesky bra straps, nip slips, or the unflattering bra bulge. With a few tips, you can use this open fashion secret without experiencing any mishaps.
Get the right tape
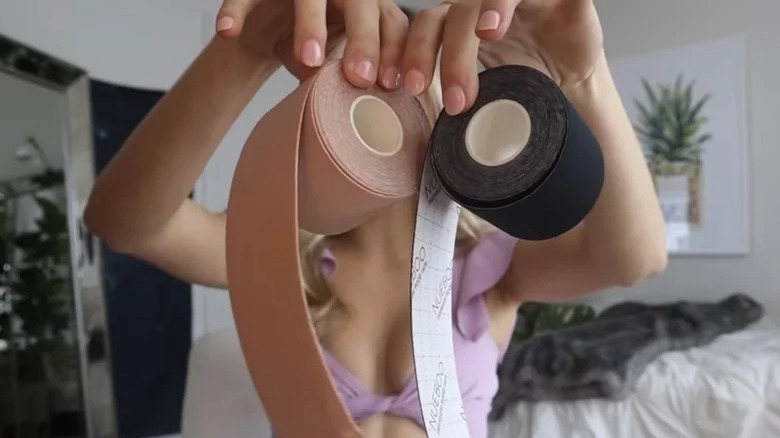
Unless you're a pro in the boob tape game, you probably would never consider taping your breasts on an average day. But there's usually that special dress for an equally special occasion like prom, your wedding, or a dinner party, which has you considering using tape. Well, the first step to properly taping your boobs is to get the right tape.
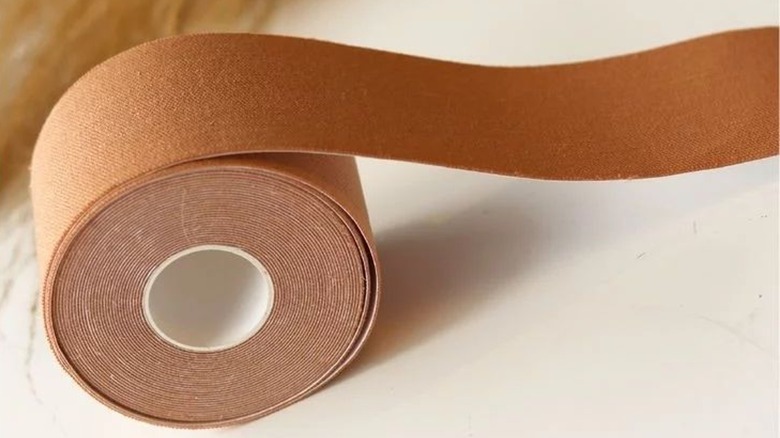
Digging out the old gaffer tape might not be necessary here as there are sticky options meant for the skin. Some women use those colorful kinesiology tapes. They are meant for the skin but are made with injured athletes in mind. There's also double-sided or fashion tape, which is a good option if you want to hold down an outfit but not hold up your breasts. And there are adhesive bras, but you're limited by the shape of the cup. A boob tape may be your best option if you want full control of how your breasts look.
When picking out one, there are some things you need to keep in mind. One is your breast size. Some brands make stronger or wider breast tapes for those with large breasts. If you have sensitive skin, getting a hypoallergenic or latex-free boob tape would be a safe choice. A transparent or clear tape might be necessary for some outfits. And if you're going to swim or if you will sweat a lot, then a sweat or water-proof and breathable tape is a good option.
Take note of the tape's instructions

Who cares about boring instructions anyway! Well, you have to — at least before using any boob tape. Brands that make these tapes usually give specific instructions on how to safely use their product. These could be given as pamphlets, on the packaging, or on their websites in the form of guides or instructional videos. It's important you go through these instructions because boob tapes may seem similar, but there could be slight differences between each brand.
Brands usually recommend what kind of product you should use based on your breast size and offer some tips on how to use the boob tape safely. Brands also give precautions about using their products. These include who can safely use the boob tape, how long you should leave the boob tape on, and whether you can reuse it. You could also find more detail about the product, like whether it is moisture or heat-resistant, or if you can swim in it.
Make sure your skin doesn't react to the tape — do a patch test!
Imagine this: You've applied your boob tape, and you're out having a good time. But your breast skin starts burning, and all you want to do is remove the tape ASAP. This is why a patch test is a must before you use any boob tape for the first time. The skin around your chest is really delicate, so protecting it is an essential step before using boob tape.
To do a patch test, take a small piece of the tape, place it on your skin, and leave it for the same amount of time you think you'll be wearing it. Per USA Today, a good spot for a patch test is your breast skin or the inside of your arm. If your skin becomes red, swollen, bumpy, or itchy, then it's safe to say that boob tape isn't for you.
Some folks are allergic to tapes in general (and not just boob tapes), notes Hypoallergenic Homes. This is likely due to an allergy to the adhesive, like latex, which is sometimes used in boob tape. A solution for these folks is to opt for hypoallergenic, latex-free, water-resistant, and breathable tapes. Thankfully, there are many hypoallergenic boob tapes available.
Apply boob tape over clean and dry breasts
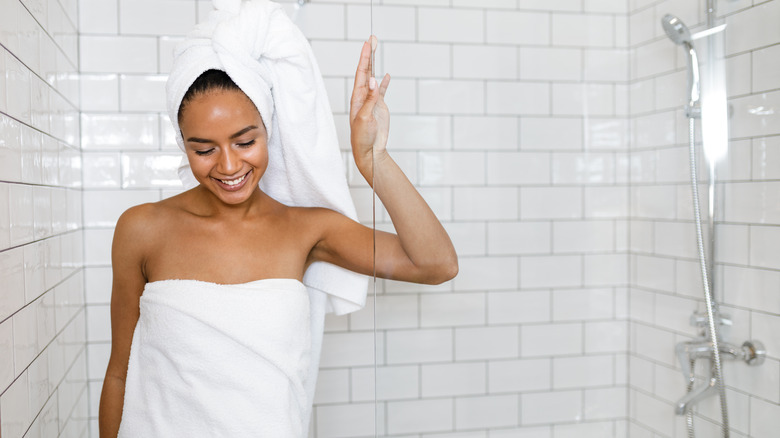
If you don't want your boob tape to start coming off in the middle of an event, you should make sure your breast skin is free of moisture before using the tape. This means you should shower to get rid of oils and dry your breasts completely afterward. You should also avoid products that leave any moisture on your skin.
So skip the moisturizer, lotion, body oil, sunscreen, and other products on the breasts that could produce a slippery and moist base. Boob tapes can be really sticky, so you might be tempted to use powder to reduce the stickiness. But this might work against you as powder would prevent the tape from sticking as it should.
It's important to note that some boob tapes are not waterproof or sweatproof. Thus, you wouldn't want to sweat a lot or swim in such tapes because the tape can start coming off. Alternatively, you can opt for waterproof and sweatproof boob tapes. But they may be only able to take so much moisture. If that moisture doesn't evaporate quickly, you run the risk of developing a water blister under your tape, which can open up when the tape is removed (via Breast Tape Co.)
Use nipple covers
It's a good practice to protect your nipples with nipple covers, also known as nipple pasties, before applying boob tape. This makes the whole experience of wearing a boob tape more comfortable. Nipple covers shield your nipple and the skin around it (which is pretty delicate) from the adhesive of boob tape. Wearing them will also provide a seamless look under the tape and the outfit. Additionally, nipple covers prevent harm and pain to your sensitive nipple area when you remove your boob tape (via Booby tape).
Most boob tape brands include nipple covers with their tape in a kit or sell them separately. You can also get a pack of nipple covers which you can use without boob tape. There are nipple covers that provide some level of breast lift. And others are meant to cover the nipples, which is great for sheer or see-through outfits. Nipple covers can also prevent nip slips with low-cut tops. They are made of different materials and often come in different styles and shapes. You can make a choice according to your preferences.
Tape from the bottom of your breasts to your shoulders for plunging necklines
You need a little creativity to use your boob tape under different styles of tops. All there is to styling your boob tape is to make sure it lifts your breasts, supports them, and doesn't peek out from your clothing — and there is a multitude of ways in which you can use your tape to make that happen. Achieving some cleavage can also be magical.
Boob tape is one of your best underwear options to pull off outfits with plunging necklines. To style your boob tape, you need to cut two to three strips long enough to extend from beneath your breasts to your shoulders. Then, cup one breast and position them the way you want them to look. Next, you should place one of the strips of tape under your breast and smoothen the tape over your breast and towards your shoulder. After finding success with the first strip, placing the other strips next to each other shouldn't be much of a problem. Once you're done with one breast you can repeat the same process on the other breast.
The bra experts at The Better Fit advise that you apply the tape "going inwards your chest" to create a little cleavage. You may also need more tapes to support a large breast. Ideally, you should try to make both breasts similar, but if that doesn't work out, it's okay. Your breasts aren't identical anyway.
Use shorter strips of tape for halter necklines
You can't extend the tape up to your shoulder for most halter necklines, or the tape will show. And some of these tops expose side boob, which can make it hard to tape from side to side. Plus, some criss-cross halter tops have low necklines. So, taping each breast vertically but with shorter strips may be the best option for these tops and similar outfits.
You really need to look at where the top covers and leaves open on your chest. Then, you should style your boob tape so it doesn't show through. As Ultimate Bra Guide advises, go "as high as your halter top allows." The higher your tape goes, the more support you'll get.
Like with a plunging neckline, you need to prop your breasts with your hands and place the tape under your boob, working it upwards towards your shoulder. Then add other short strips of tape for more support. Remember to mold your breasts inward for cleavage. Another option is to run the tapes diagonally or horizontally toward your breastbone. Of course, you should only use this method if your outfit allows it.
Use the bandeau style for strapless or thin-strapped dresses
Boob tape is also a great option for strapless or thin-strapped dresses. Yes, there are strapless bras, but they may be unsupportive, especially for those with larger breasts. Plus, there's always that premonition that your bra is going to ride down, and you have to awkwardly drag it up. What's more, you don't need to wrap the tape around your back, so this is great for those low-backed and strapless styles. Like for any other dress, the way you apply your tape depends on the cut of your outfit.
For the bandeau style, you need your strips of tape to be long enough to go from one side of your boob to the other. When applying the tape, you should start from the bottom of your breasts and layer two or more strips as you move upwards to get your desired support. To really do wonderful things for your cleavage, one trick is to "lean forward" while applying the tape "to get even more lift," as USA Today notes.
If you want to expose a bit of under-boob cleavage, you should run the tape diagonally from the side of one breast to the top of the other boob. Just note that you should follow the outline of your outfit to avoid tape showing through. And if it does pop through, you can always trim some of the excess bits away.
Stick your boob tape well — follow these tips
You've got the dress, and you've got an idea of how you want to style your boob tape — take some notes before you jump right in. While any mistakes you've made with boob tape are difficult to correct once the tape has been placed, you can anticipate and avoid them.
For starters, you never want to stretch the tape when sticking it on. Most boob tapes are made with stretchy materials, but this is so the tape is flexible enough to move with your breasts, not necessarily to clench your breasts when you apply the tape. Instead, you should hold your breasts with one hand and apply the tape with the other. Stretching the tape while applying it can give you a flattened, taped-down-looking appearance and not that round shape you likely desire.
You'll also want to round the corners of the boob tape. This hack reduces the chances of the tape peeling away from your skin and catching onto your dress. Not applying enough tape not only leaves your breasts fully unsupported but also "can lead to too much tension on the skin which causes skin pulling irritation," notes Good Lines. But using too many strips may make you hot, so it's important to find that good balance. You also want to make sure the tape sticks properly by molding and rubbing your breasts after applying the boob tape. This removes any air spaces and activates the adhesive.
You're not done till you remove your boob tape
You've had a fun evening out in a swanky dress with your breasts taped to achieve that flawless look. All that's left to do is the final step: Safely remove your boob tape. This is important as most boob tapes are meant to be worn for no more than 12 hours, but some have a shorter or longer time frame.
Douse any notion of ripping your boob tape off like a Band-Aid. Instead, douse the tape in any body oil of your choice for about 15 minutes. This will break down the adhesive so you can gently peel each tape off your skin. How much oil you'll need for this operation depends on how much tape you've used in the first place. If the tape doesn't come off easily, you need more oil. You'll likely need extra oil if you've spent a lot of time (over eight hours) in the tape.
An alternative boob tape removal technique is to take a warm shower or bath. It's always a good idea to follow the removal advice given by your boob tape brand. Lastly, you'll need to get rid of any bits of adhesive left on your skin. Your breast skin can also use some moisturizing to help with skin dryness. If you experience skin irritation, an allergic reaction, or skin peeling, you should report this to your provider to get it treated.
Prepare, practice, and play around with your boob tape
If you decide to go with boob tape for a specific dress, you should consider getting your boob tape well in advance. This would give you enough time to do a patch test with the boob tape, which can be really helpful as you don't want to have irritated skin on your special day if you have a reaction to it.
Another benefit of getting the tape in time is you have room to experiment and get the hang of using boob tape. You likely won't tape your boobs perfectly on the first try. And you probably don't want to ruin your day with an underwear malfunction. So being prepared can give you the time to get creative and experiment with different styles before your event.
You can note how these styles support your breasts and get used to the feeling of wearing boob tape. It's also a good idea to test if you can move freely when wearing boob tape. So wiggle a bit and dance if you have to. After all, you need to make sure you've got the right tape so you can reorder a different one if need be. Finally, you need to practice properly removing your boob tape to decrease any chances of future pain and so that your overall boob tape experience is one you'll want to enjoy again and again.