6 Makeup Tips To Help You Hide Spider Veins
We may receive a commission on purchases made from links.
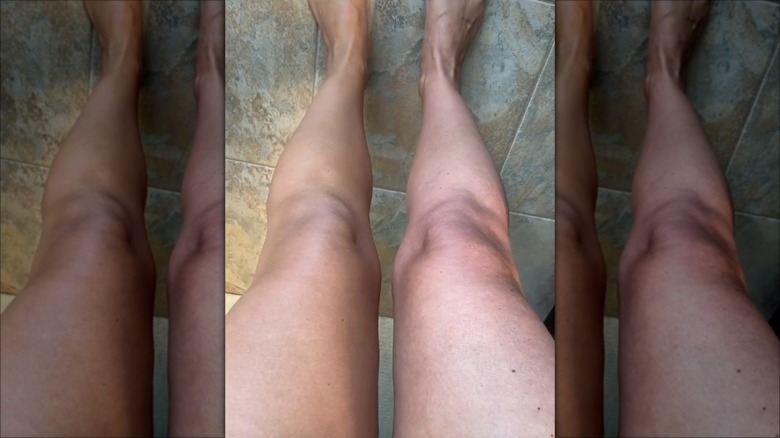
Everybody has veins — some are just more noticeable than others. And if you have spider veins, you may know this all too well. While it's not uncommon to have visible veins on our bodies, spider veins are typically more noticeable because they form in "clusters that resemble spider webs or tree branches," according to the Cleveland Clinic, and can be red, blue, or purple.
Not to be confused with varicose veins, which typically bulge out, spider veins aren't really veins — they're actually small blood vessels that have been damaged, sometimes due to sitting or standing for long periods at a time or from hormonal changes. The good news is that they usually don't come with any symptoms and, most of the time, don't cause any health issues.
Spider veins typically appear on the legs or face, and while there are treatment options available, you may want a quick cover-up. This is where your handy makeup skills come in, and we've got tips that'll help you cover up your spider veins like a pro.
Use self-tanner for an all-even glow
The first step in evening out your skin is to use self-tanner. While this may not completely hide your spider veins, it'll give you a nice base color that will help you further disguise the red or blue marks. To get the most even application, the American Academy of Dermatology advises exfoliating your skin first. Next, apply the self-tanner "in sections," being careful to blend around your knees and ankles.
Using a large self-tanner mitt is especially helpful for blending over large areas, such as your legs. Let the tan work its magic for at least four hours (or the time indicated on the product) before rinsing off. For a deep color, allow the formula to sit overnight and wash it off after eight hours.
After the initial application, you may want a second coat for more color or to even out patchiness. If you see uneven color, lightly buff away the area with an exfoliating towel or scrub. You can also fill in lighter spots with more self-tanner. Once you are happy with the color and overall application, if you need more coverage, you can do so with makeup.
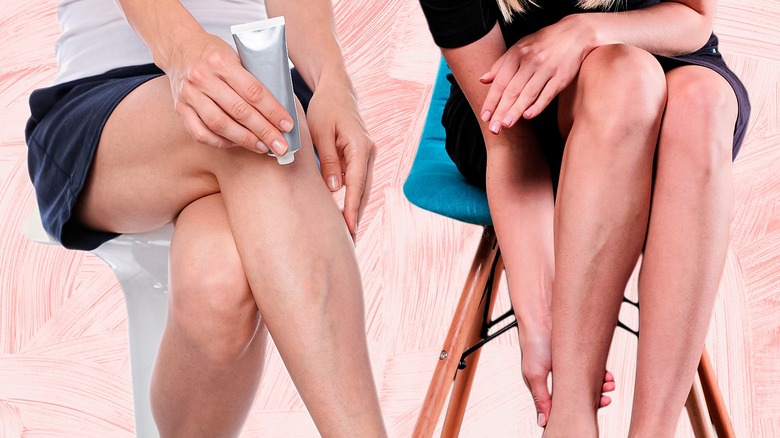
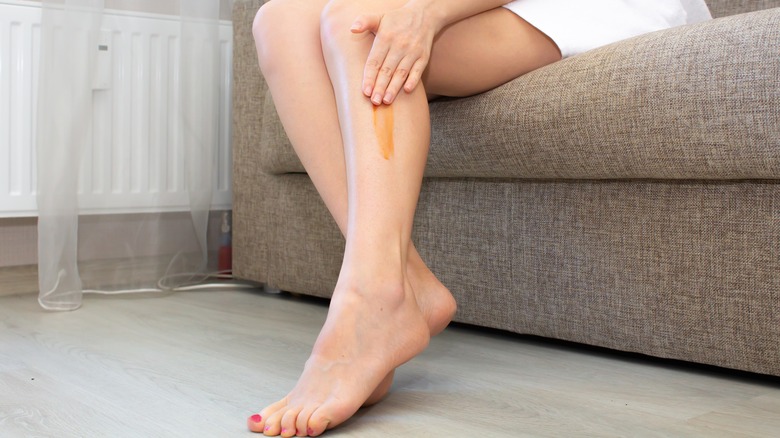
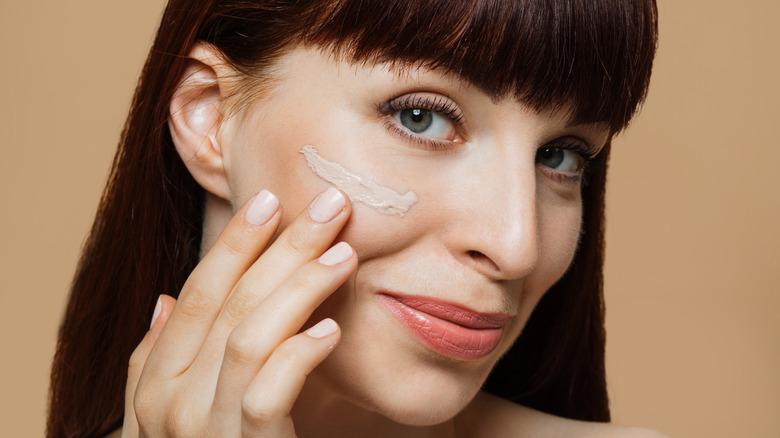
Apply a color corrector according to your spider veins' undertone

As mentioned previously, spider veins can be either red, blue, or purple, and to eradicate those colors, you're going to need a color corrector to correct your skin's problems. Whatever shade your veins are, you'll need a contrasting hue. If your veins are red, you should opt for a green concealer. For blue veins, you're going to want an orange color corrector, and for purplish veins, a yellow or peach shade will do.
To neutralize the color of your veins, take the appropriate color corrector and dab it on with a small concealer brush. Blend the makeup into your skin using a blotting motion with the round end of your makeup sponge or brush. Concentrate the color corrector onto your veins, being sure not to spread it around too much. Reapply once more if you need more coverage, but keep in mind that you'll need to apply concealer and translucent powder over it to ensure a seamless blend, so use a light hand.
Full-coverage concealer can do wonders for spider veins
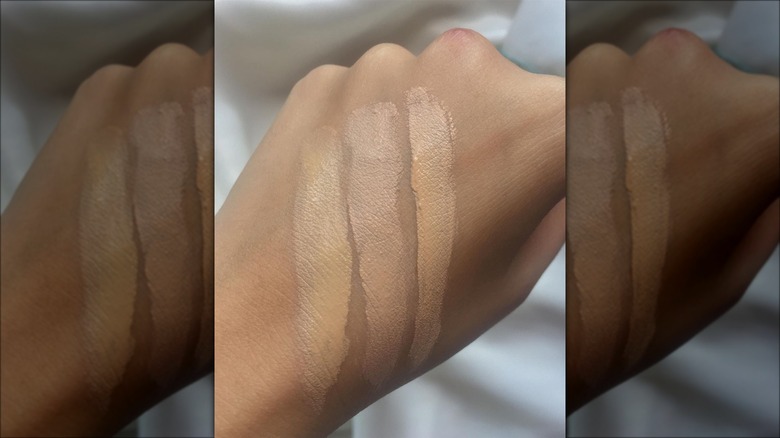
Since color correctors will leave a tint on your skin, a concealer in the shade of your skin tone is needed on top. If the concealer is very thick with a full-coverage finish, you may be able to use concealer on its own. Unlike undereye concealer, which can be one or two shades lighter than your skin tone, make sure that the makeup for your spider veins matches exactly. If the color is even slightly off, it'll be noticeable (unless you're applying concealer everywhere).
Look for a cream concealer, which usually comes in a pot or a palette. Full-coverage concealers are also ideal, as they will be able to completely cover the skin, especially if you apply a setting powder on top. Use a colorless translucent powder and let it bake for a few minutes before dusting off the excess.
As with the color corrector, use a brush to apply the concealer over your veins and blend it with your makeup sponge. Try not to drag or rub the sponge on your skin, or it will take away some of your hard work. While liquid concealers look the most natural, full-coverage ones are going to give you the best results.
BB and CC creams are good lightweight options
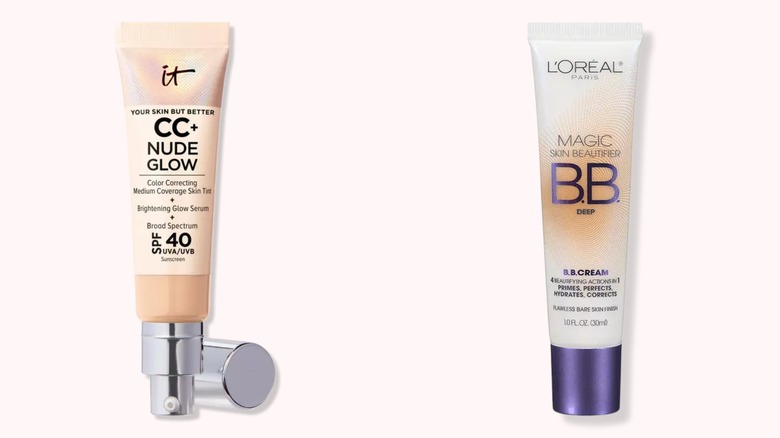
If your spider veins are minimal and you just want light coverage, reach for your BB or CC cream. While they might not totally get rid of the color, they both have neutralizing effects without the heaviness of full-coverage makeup. You're probably wondering what the difference is between BB and CC creams.
They're similar in that they both moisturize and conceal blemishes. They also have added ingredients that nourish the skin. However, CC creams offer more coverage and help even out the skin tone. "It has color correcting qualities that can make it a better fit for people who need a little more color balance," celebrity makeup artist Brittany Spyksma told Byrdie.
Because of their hydrating properties, you can apply BB and CC creams directly to your legs without any moisturizer or primer. Some good options include IT Cosmetics CC + Nude Glow and L'Oréal Magic Skin Beautifier B.B. Cream. Mix some of the product in with lotion or use it on its own for more coverage. If you're just spot-treating your spider veins, dab some on with your finger and gently blend it in. Finish it off with a dusting of setting powder to keep the makeup budge-proof.
Leg makeup sprays are a quick option for covering up spider veins
Spider veins can be quite large, and if you need to cover your whole legs, airbrush makeup sprays are the way to go. One of the best ways to apply this is to spray it onto your hands and then rub it onto your legs. Or do as TikToker @bloves.beauty does — spray it directly on your legs, rub it in with your hands, and reveal a smooth and even finish. Your skin should be moisturized prior to the application. Let it dry for about a minute, and you're good to go.
Many of these leg makeup sprays, such as Sally Hansen Airbrush Legs, promise to be water-resistant, so these are a great option for beach or pool days. If you take a dip in the water, have your can handy so that you can do a quick reapplication. It will look like you're applying sunscreen, so no one has to be the wiser that you're covering up your spider veins! Just make sure you get the correct color so that it matches your skin tone, especially if you plan on getting a tan.
Create your own tinted moisturizer with your foundation
Tinted moisturizers are another fast fix for spider veins, as it's a two-in-one product that lets you apply lotion and makeup at the same time. If your spider veins are in a large area, the tinted moisturizer that you have for your face may not be enough. You won't want to use up your whole bottle on your legs — so you can make your own with just two products.
For a dermatologist-approved DIY tinted moisturizer, mix equal parts body lotion with your foundation shade into a jar. Your face may be a different color than your legs, so do a patch test first. If you need more pigment, you can add another drop or two of foundation.
For extra coverage, add in a couple of drops of color corrector. As mentioned prior, use one according to the undertone of your spider veins. It'll help neutralize the color, while the moisturizer-foundation mix will give you an overall smooth canvas. To help keep the makeup from transferring off, blast the area with a setting spray, and your skin will be spider vein-free for hours.