How To DIY The Viral Rose Quartz Nails And Save Your Salon Manicure Money
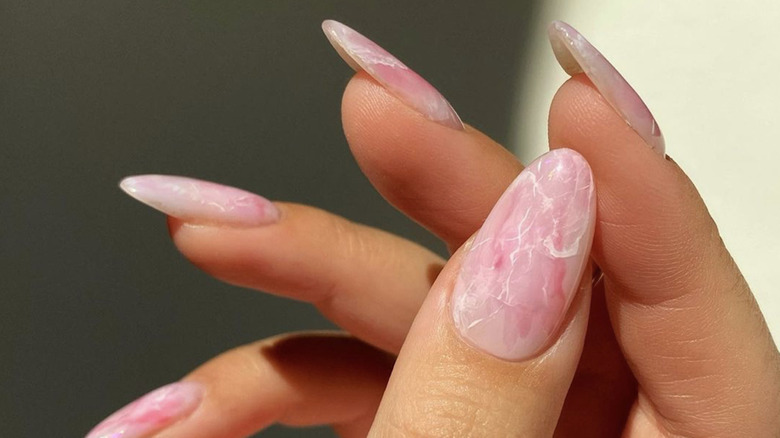
The world of nail art is constantly offering up new design trends for adorning your fingers. One of the latest styles to make your fingernails stand out is known as "rose quartz nails." As the name describes, this nail style features a multi-tone pink design with a swirl and veining pattern that evokes the color and texture of rose quartz.
If you get your rose quartz nails done by a professional nail artist, you'll likely get an exquisite, detailed nail design that will make it look as if your fingertips have been sculpted from luxury stone. But if your budget requires you to paint your rose quartz nails at home, you're in for a tough challenge. Typical rose quartz painting methods involve a multi-step process of building up layers of gel nail polish to achieve the desired result. However, most of us amateur nail artists don't have the skills, resources, or time to hand paint several layers of marble patterns onto fingernails.
Luckily, there's an easier way to DIY rose quartz nails. As Lights Lacquer shares on TikTok, with a simple nail stamper hack, you can get gorgeous rose quartz nails without breaking a sweat.
How to DIY rose quartz nails
This DIY rose quartz nail hack from Lights Lacquer is incredibly easy: All you need are three nail polish colors, a top coat, nail polish remover, a small nail brush, and a nail art stamper. For those who are new to the DIY manicure world, a nail art stamper is a clear, squishy stamp that you can use to apply nail polish designs to your nails. Nail stampers are inexpensive and extremely useful to have on hand for home manicures.
In the TikTok demonstration, the first step is to carefully apply three dots of nail polish colors to the surface of a nail art stamper. Your three colors will make up the palette of your rose quartz design. The video uses two shades of pink and a shade of white. Place the dots on the stamper so that they slightly overlap and blend with each other.
After getting the polish onto the stamper, begin lightly patting the stamper into your nails. Instead of trying to cover the entire nail with the stamp, transfer the polish onto different sections of the nail to create a more blended and varied pattern, thus producing a rose quartz effect.
Once you apply the rose quartz pattern to all your nails, you can clean up the edges with nail polish remover and a small brush. Finally, finish with a clear top coat and voilà! You have beautiful rose quartz nails.
Tips for getting the best rose quartz pattern
This nail stamper hack is a great way to get an expertly detailed rose quartz pattern without much effort. If you want the best results possible, there are a few tips to keep in mind.
Since the blended nail polish is doing all the work for you, picking the right colors is essential to getting a nice rose quartz design. When choosing your colors, opt for cool tones. Rose quartz should have a crisp cooling effect, much like the stone itself. If your shades of pink are too warm, the end result could look too muddy or muted. Along similar lines, try to get two shades of pink that are distinct from each other but still only a few shades apart. If the pinks are too close in color, you'll have no rose quartz pattern. On the other hand, if they contrast too much, your nails will look more like a tie-dye design than rose quartz.
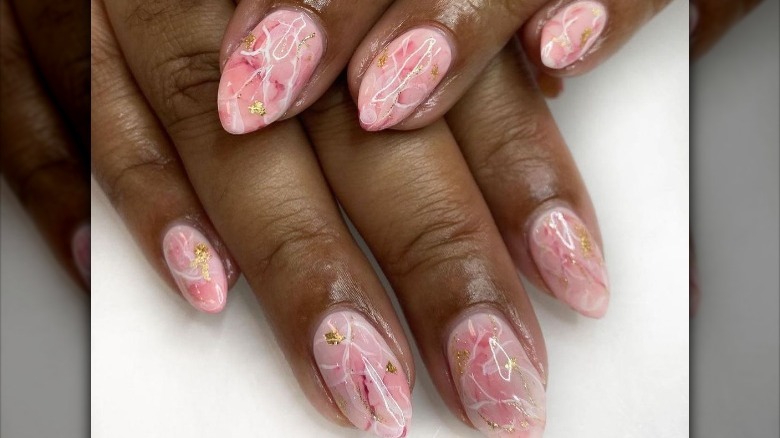
Finally, if you want some extra glamour on your rose quartz nails, add a small vein of metallic nail polish as an accent before applying your top coat. You can choose gold, silver, or rose gold nail polish, take a small detailing brush, and apply one or two squiggly veins to the rose quartz pattern. This detail is a fun play on the metallic Barbiecore style and gives you a luxurious nail design that's both on-trend and on budget.