The Ultimate Guide To An At-Home Dip Manicure
We may receive a commission on purchases made from links.
Who doesn't love a good salon manicure? Manicures have the power to transform our entire look, taking our nails from dull to glamorous in an instant. Getting a manicure is also a form of relaxation, giving our fingers a much-needed break from typing and texting.
While it's safe to say most of us love a good salon manicure, they also come with downsides. Though relaxing and fun, salon manicures are also incredibly time-consuming, and they're constantly becoming more and more expensive. These realities have turned many of us to the at-home manicure, but those typically don't last as long.
Enter: the dip manicure. If you haven't gotten one at a salon, you've probably seen another client get a dip manicure. Dip manicures keep your natural nails long and strong for weeks and are achievable at home. If you're looking to save time and money while maintaining a lasting manicure, look no further than our ultimate guide to an at-home dip manicure.
Have a strong nail base
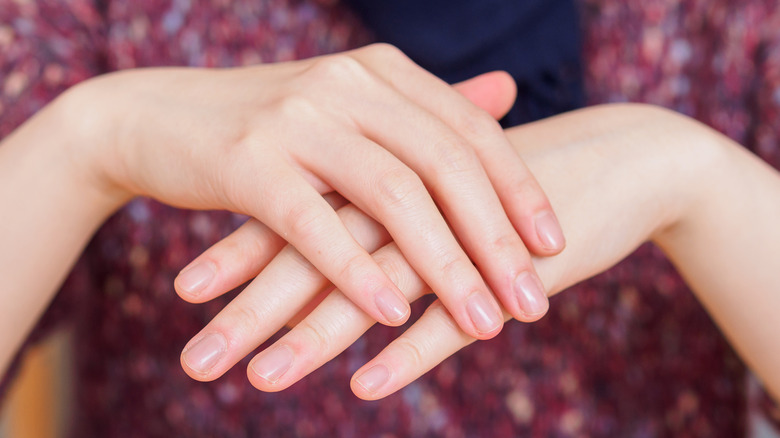
As is the case with all manicures, a strong at-home dip manicure requires a strong base. It's especially important when giving yourself a dip manicure at home because you likely aren't using builder gels or acrylic extensions (though you totally can if you have the right tools). So, you'll definitely want to make sure your natural nails are strong enough for dip powder before giving yourself a manicure.
You can improve the health and strength of your nails by keeping them clean, caring for your cuticles, moisturizing your nails, and using a nail strengthener. Your food can also impact the health of your nails, so make sure you're consuming a nutritious, balanced diet.
While dip powder can aid your natural nail in growth, it's still an artificial substance adhering to your nail, and that can cause damage to your natural nail just like any other polish type. After each manicure, evaluate the health of your nails. If you notice any discoloration or damage that can't be remedied through filing, give your nails a break and let them heal. If the discoloration or damage persists, see a doctor or a dermatologist, as those could be signs of nail fungus, infection, or another underlying health condition.
Gather the right tools
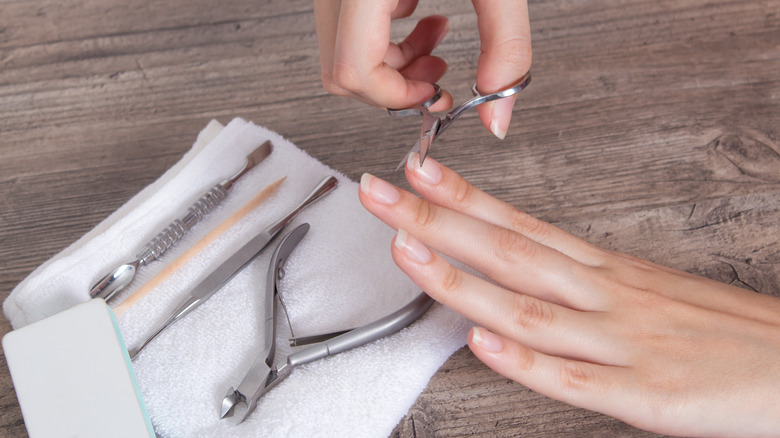
All good manicures are at the mercy of the right tools. If you've had a professional manicure, you know nail technicians are teeming with tools used to make the manicure easier, and all of those tools can be purchased for use at home.
The tools are an investment, and it may take some time to gather them if you don't want to purchase everything at once. But if you're serious about giving yourself regular at-home dip manicures, you'll save money in the long run by foregoing appointments at the salon. Start by purchasing the most necessary items, like cuticle trimmers, files, and nail clippers. You likely have most (if not all) of these items at home already, but if you don't, you can purchase them in a kit.
For a dip manicure, you'll need builder powder, base polish, top coat polish, nail activator, and colored dip powder. The polishes and nail activator should come in a set, but you may have to buy the builder powder separately. Another tool worth investing in is an electric nail file. Most of what it does can be done manually, but an electric nail file speeds the manicure process along, saves you a ton of effort, and gives your nails a smooth finish. Depending on what your salon manicure costs, you might spend less purchasing the tools.
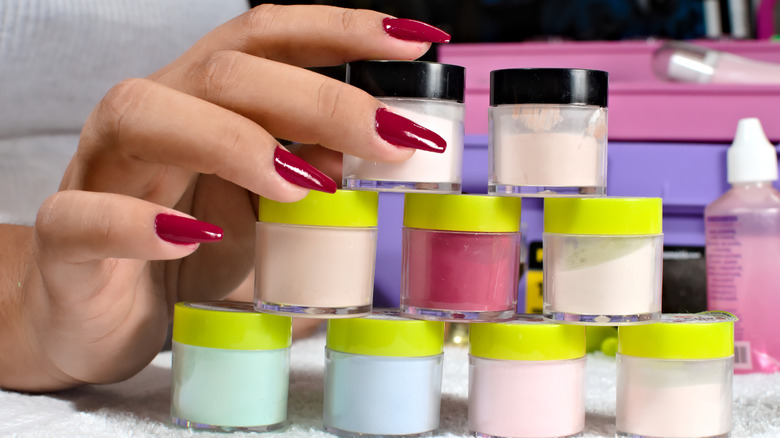
Have color options

If you are going to give yourself a dip manicure in place of a salon manicure on a regular basis, you'll likely want some color options. The good news is that most brands sell their powder colors to the masses in sets. If you like a wide range of manicure colors, start by getting a set of powders that spans the color wheel. It'll take months and months before you've exhausted your options. If you tend to stay in the same color family, no worries — there are plenty of like-shade sets sold, too.
Do be warned that finding a color brand you like takes some trial and error. Not all brands are created equal, and you'll have to perform test manicures in the process. Some powders are chalkier than others, and some don't build as well or last as long. It can be especially difficult to find glitter shades that you like, and you'll quickly find dip powder glitters behave much differently than polish glitters. Once you've found a brand you like, stick with it. It'll be easier to become accustomed to one brand than to learn how to work with multiple powder types.
Don't neglect your cuticles
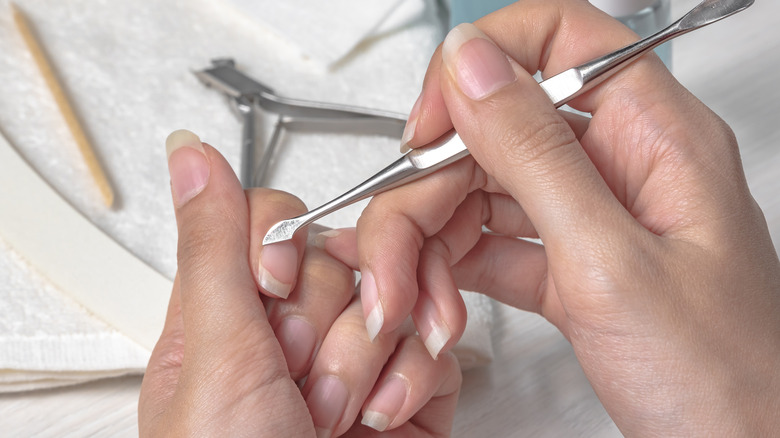
Before you even begin working with your nail plate, prep your cuticles for your dip manicure. If you're going to the trouble of giving yourself a manicure, you want every part of your nail to look good. We understand the trepidation: Cuticles can be intimidating to work with, and if you mess up, it can result in serious pain. But with the proper tools and techniques, you can avoid a bloody mess and keep your cuticles looking fabulous.
As noted, you'll need the right tools to properly remove your cuticles at home. An average nail clipper is not going to work, nor will nail scissors. Get a proper cuticle trimmer, as well as a cuticle pusher, cuticle oil, and possibly a cuticle remover. Start by taking rubbing alcohol across your nail plate to remove any dirt or debris, then moisturize your nails either by soaking them in water or applying a cuticle remover. This will loosen the skin and make it easier to care for your cuticles.
Once they're soft, use the pusher to push back your cuticles. Next, carefully examine to see if there are rogue nails or skin hanging off your cuticles, and use your cuticle trimmer to remove those bits. Don't go any further, as snipping at your actual cuticle is what causes bleeding, pain, and unsightly fingers. Follow up with cuticle oil, but wait until you've finished your dip manicure for that step.
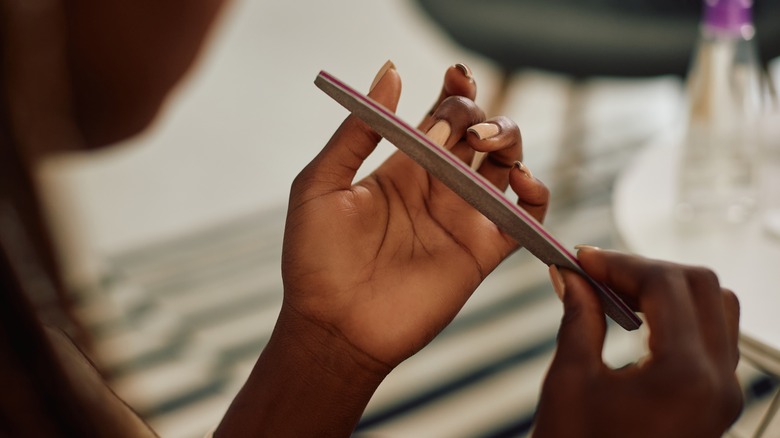
Start by filing your nails

The manicure starts with prepping your nail plate, and the first step is filing. First, make sure your nails are in the basic shape you want them. Most of us just follow our natural nail shape, but if you prefer something different and have long enough nails to create a different shape, go right ahead. There's no need to spend too much time making sure each nail is shaped to perfection, though, as you'll have to file quite a bit later on after the powder is applied. Just get each of your nails to a similar enough length and shape as the others to start the manicure.
Next, take care of the top of your nail. Our nails are naturally smooth, but we need them to have some texture for a dip manicure so the powder has something to adhere to. Gently run a basic nail file across the top of your nail plate to create that texture. (You can skip this step, just know that your manicure won't last as long.) After you've filed the tops of your nails, remove the dust either with a fluffy brush or by washing your hands. Many dip powder kits include a brush, but a clean makeup brush will suffice if you don't have one.
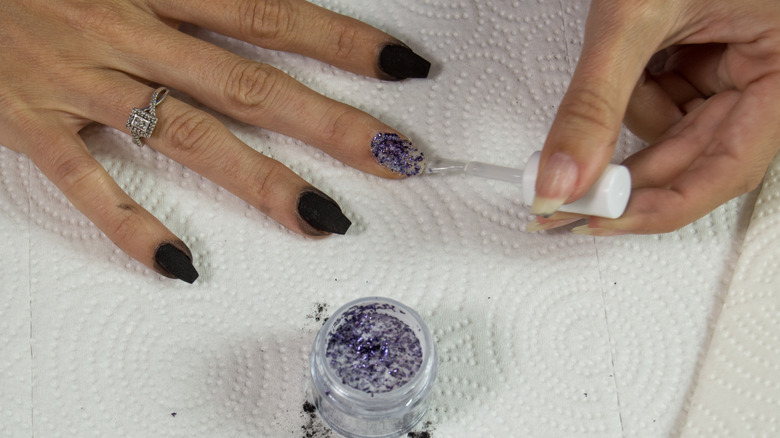
Master the art of dipping

Once your nails are prepped, it's time to start dipping. You'll need base polish and colored powder; most people also use builder powder, which isn't necessary, but it does offer an extra layer of strength and protection for your natural nails. Start by applying a coat of base polish, and then apply builder powder. If you skip the builder powder, apply the base polish and the colored powder.
There are multiple ways you can apply the powders. If you're the only one who uses the colors, feel free to dip your finger directly into the pot. If multiple people use them, use the tray that came with your kit to house the powder and dip your finger into that (if your kit didn't come with a tray, you can purchase one separately). If you use the dipping technique, dip your finger in and out at an angle so the powder doesn't buckle.
You can also use a scoop and drop the powder over your nail. Either method will work — it's simply personal preference. If you're unsure of what to do at any point, think back to getting a manicure at the salon and follow the same steps your nail technician takes. Let the colored powder set, then remove any excess powder with the fluffy brush. Continue that process until you've reached your desired thickness (usually two or three coats). If you're feeling adventurous, there are tons of dip powder nail designs to dive into as well.
Activate the powder and shape your nails
After you've finished applying the colored powder, apply a coat of activator to each of your nails. Make sure the activator covers the entire nail plate, and don't skip this step. The activator will harden and prepare your nails to be filed, shaped, and buffed. After applying the activator, wait for it to fully penetrate your dip powder and set completely.
If you begin filing your nails before the dip powder has set, the powder will crumble off your nails and ruin your manicure. You'll know the powder has set when it turns a color more similar to the color it takes in the pot. It'll be lighter and have a matte finish. (The base coat will have given the powder a darker appearance that more closely resembles the finished product.)
Once your dip powder is set, it's time to start shaping. Your nails will likely be a bit of a mess, so take a file to smooth out your edges and shape your nails back to perfection. Part of the dip powder will likely have stuck to parts of your skin, so use your file to separate the powder and shape your nail. Shaping can take some time, so be patient and just keep filing.
Pay close attention to the edges

After the tops of your nails are taken care of, take a look at the edges near your cuticle. If those need to be sanded a bit, use your electric nail file and a round attachment, being very careful not to break the skin. You should be able to control the speed of your file, so turn it down to the lowest speed when working near the skin.
If you fear the electric file is too aggressive for your edges, just use a regular nail file, but still be gentle. After the edges near your cuticle are taken care of, take a final pass at the rest of the nail edge using your manual file to ensure you have your desired shape.
Filing your edges is an important step in an at-home dip manicure to give them a professional look and to help them last longer. As your nails grow out, a gap between your powder and your cuticle will form. Hair, clothing, and more can work their way underneath your dip powder and separate it from your natural nail. For a lasting dip manicure, make sure the edges near the cuticle are as close to the cuticle as possible. File more as necessary as your nails grow out to maintain your manicure.
Learn how to buff and grind
After you've filed and shaped your nail edges, the tops will need some attention. If you look at your nails from the side, you'll likely find that they are uneven. The easiest way to even them out is by using an electric nail file and carefully grinding the powder on each nail until the tops are even.
You can use a regular nail file to do this, but it will take much longer and wear your nail file down much faster than with regular use. Your electric nail file will have several attachments — choose one with a similar texture to your manual nail file for this step.
Once you've finished filing, buff the tops of your nails so they're completely smooth. A nail buffing block works great for this step, but there may be an attachment on your electric nail file that works for buffing, too. If you use the buffing block, follow the instructions and buff accordingly. This will give your nails a smooth finish and lots of shine, making your at-home dip manicure indistinguishable from a salon manicure.
Don't forget the top coat
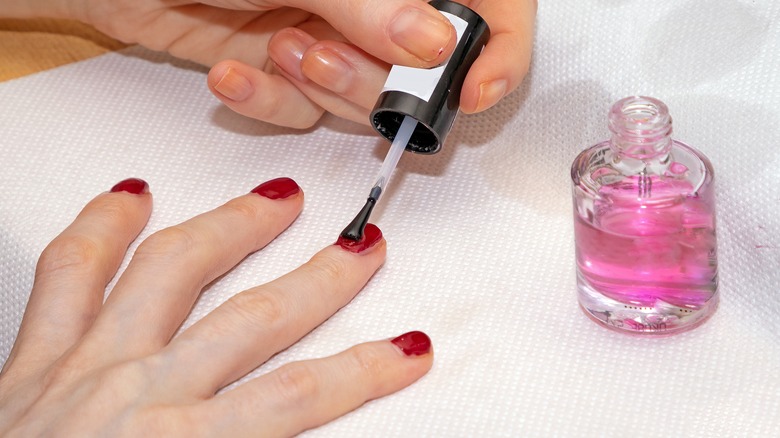
After you've finished buffing your nails to perfection, it's time for the top coat. A top coat will complete your manicure look and keep your dip powder strong for the duration of your manicure. As noted, most polish sets will include a top coat, but you can use a different one if you'd like.
The top coat included in your polish set will almost certainly have a shiny finish, and it'll likely take quite a while to dry. If you want a matte finish or to avoid that long drying time, use a different top coat. If you have the tools, you can use a gel top coat and use a UV lamp to set your nails, but consider the potential side effects of using UV lamps before going that route since they emit UV radiation (hence its name), which can break down the skin's collagen and cause premature aging (via Cleveland Clinic).
After your top coat has dried, wash your hands with soap and water, then clean and disinfect your space, especially if you cut your nails and trimmed your cuticles. Then follow up with all the same TLC steps your nail tech takes at the salon. Massage oil into your cuticles to keep them soft and strong and avoid hangnails. Then take your favorite lotion and massage that into your entire hand to get the complete salon experience at home.
Be gentle with removal
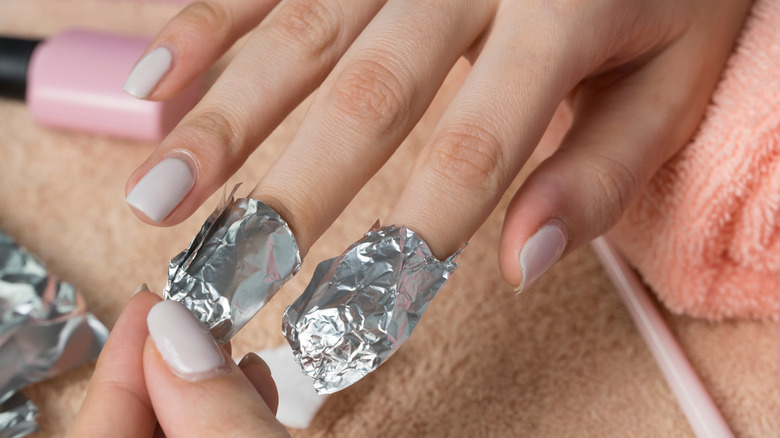
Some may see dip powder removal as a disadvantage to an at-home manicure, but if you take the proper steps, removing dip powder nails at home is easy. The most important part of at-home dip powder removal is waiting until the powder is ready to be removed. As your manicure ages, you'll notice the powder separate from your nails, and the gap between your powder and your cuticles will become more noticeable.
These are signs that the powder is ready to be removed. If you remove the dip powder prematurely, it can take longer, be more difficult, and damage your nails. Some, if not all, of your dip powder might simply pop off your natural nails. If you can gently pop the powder off without damaging your nails, that's a fine route to take. If they need a little more help, follow the same steps your nail technician would take at the salon.
File the tops of your nails either with a manual file or an electric file, then soak your nails in a bowl of acetone. (If you need your hands during this process, you can soak a cotton swab in acetone, place it on your nail, and secure it by wrapping tin foil around your finger.) Once they've soaked, the powder should come off rather easily, either with a cuticle pusher or an acetone-soaked cotton swab. If your nails look healthy after removal, feel free to give yourself another dip manicure.
Take your time

When giving yourself a dip manicure, be patient. It can be a tedious, time-consuming process, but the results are best when you're deliberate and careful, and both require patience. Your at-home manicure will save you time spent at the salon, but you'll still have to put some time into the manicure itself.
Take your time with each step, and allow everything to dry and set properly before moving on to the next step or going about your other household activities. If you need to, use a timer to ensure you don't check your nails or move around before they're ready.
Be patient with yourself, too. If you've never given yourself a dip manicure before, it can be tricky. Give yourself space to learn a new skill, and allow yourself some time to get the hang of it before being too judgemental of your performance. In time it'll become easier, and soon your at-home dip manicure will look just as good as your salon manicure.