Interested In Upcycling? 6 Tools You'll Want To Get Started

We may receive a commission on purchases made from links.
Fashion upcycling is a fast-growing response to both the climate change crisis and the current inflation that has limited nearly everyone's wardrobe budget. Upcycling involves taking a secondhand clothing item or one that you already own and altering it. On the most basic level, this encompasses quick and easy makeovers like cutting jeans into shorts or a crewneck into a boatneck; more advanced upcyclers are almost unlimited in their ability to craft a whole new garment from a discarded one.
If you're interested in trying out upcycling for yourself, check out social media influencers like Lily Fulop on TikTok or Anna Molinari on Instagram for tips and inspiration. Then, start gathering potential garments from your closet or secondhand stores and assembling your tool kit. We've curated a convenient list of just six items you'll need to start your very own upcycling operation (clothing items and sewing skills sold separately, of course).
Sewing machine
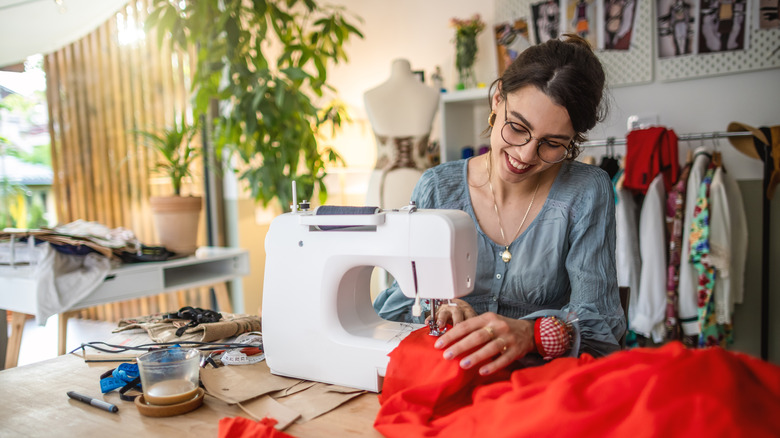
The biggest investment you'll need to make in your new upcycling hobby or side hustle is a sewing machine. No need to panic, however — you don't need a top-of-the-line, professional machine to get started. In fact, even a miniature portable machine provides plenty of power for beginner upcycling projects. Look for a reputable brand like Brother or Singer. Used full-size machines can often be found at low prices or even for free on Facebook Marketplace, at local yard sales, or in thrift stores.
Once you get your hands on a machine, spend some time acquainting yourself with basic sewing techniques before you jump into your first upcycling project. Studying a few basic tutorials on YouTube from creators like The Essentials Club can help you understand the types of stitches and their purposes along with the key differences between fabric varieties, how to thread your sewing machine, and much more.
Thread
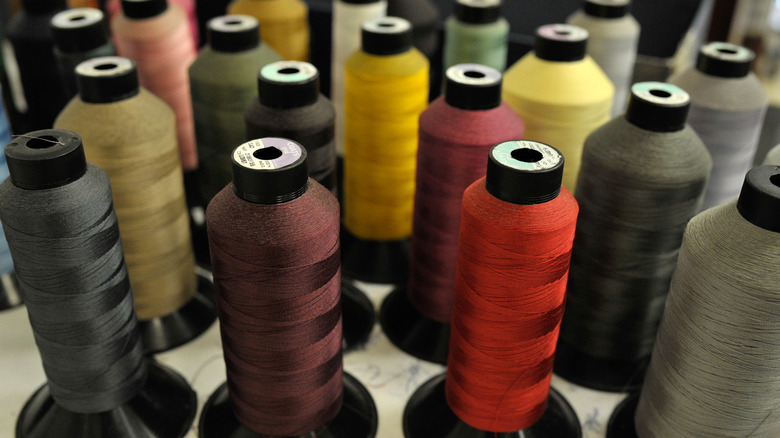
Unless you're going for a raw-edge look like cut-off denim shorts or a deconstructed off-the-shoulder tee, your upcycling project is going to require sewing with thread. Thread seems like a simple product that shouldn't require much thought to acquire, but you'd be shocked at how in-depth the topic of thread can quickly become. For instance, a low-quality thread might save you money, but it's more likely to break during the sewing process and to shed lint, which can clog your sewing machine over time.
Thread also comes in a variety of sizes, known as weights. The higher a thread's weight, the finer the thread. There is also the matter of plies, which are the individual strands twisted together to create a thread; more plies generally equal stronger thread. As a beginner, you'll want to look for an all-purpose, lint-free cotton or polyester thread. In most cases, you'll want the color of the thread to match or tastefully complement the garment you're sewing.
Fabric scissors
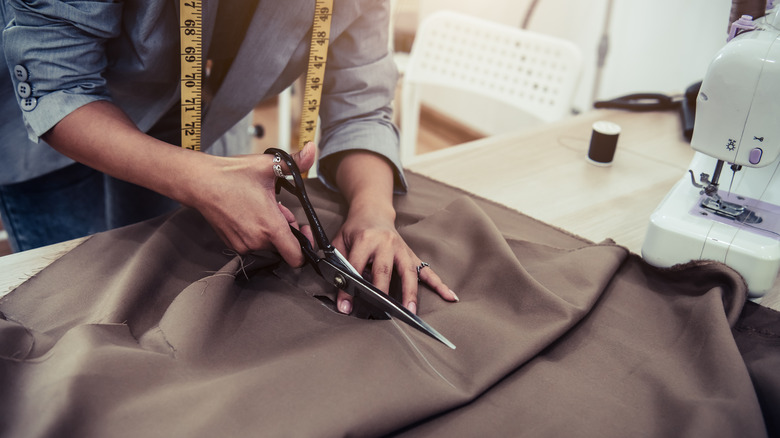
When you start your upcycling journey, it might be tempting to grab a pair of kitchen or art scissors and get to work on altering your garments. Honestly, this approach might even work at first. But it won't take long for your regular scissors to dull to the point that they create frayed, jagged edges on fabric — and the finer the fabric, the more damaged it will be by dull blades.
Scissors designed specifically for the purpose of cutting fabric are sharper than those created for other uses. They are typically made from materials that hold their edge longer and are easier to sharpen. The blades of fabric scissors are also longer than those of general-purpose scissors (in order to require fewer cuts and achieve a smoother line), and they are set at an angle that makes cutting fabric easier. It's well worth the $10-$20 investment to buy a pair of fabric scissors before you start upcycling. Just be sure that you only use them to cut fabric to avoid dulling their blades.
Rotary cutter and mat
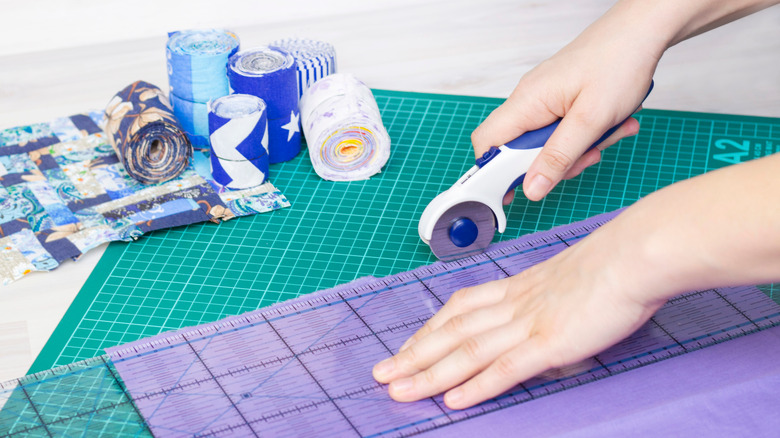
Upcycling requires a lot of deconstructing of garments before you can transform them into something new, and sometimes, your project will require longer, smoother cuts than even fabric scissors can reliably produce. For these moments, you'll need a rotary cutter with a self-healing mat. A rotary cutter is a tool that looks very similar to a classic pizza cutter. Its blade, however, is much sharper than the kitchen tool's. Using a rotary cutter allows you to produce continuous straight, smooth cuts without any of the jagged edges that can be created by opening and closing scissors.
A rotary cutter makes projects requiring long cuts — like pants and maxi skirts — much easier and is essential for no-sew projects that will utilize raw fabric edges. If you plan to completely skip sewing and stick to easy deconstructed projects like cutting off hems or cutting out cold shoulders, a rotary cutter may be the only tool you actually need to get started.
Tailor's chalk
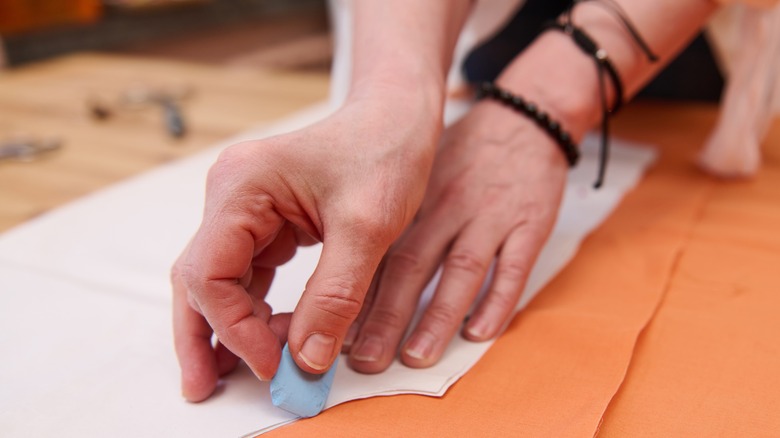
Before you actually cut a garment that you plan to upcycle, it is imperative that you plan your cuts to avoid making irreparable mistakes. It may look easy to cut a perfectly straight or curved line until you unfold the piece of clothing in question and find a line that's diagonal or an off-center curve. If there isn't enough space left to correct the cut, your garment could end up wasted or relegated to your scrap fabric pile.
A simple, inexpensive tool like tailor's chalk can make all the difference in the success of your upcycling projects. These colored disks of washable chalk allow you to measure and mark exactly where your cuts should be before you make them. Any remaining chalk on the finished garment will disappear the first time you wash it. It's also easy to find — you can pick up a multicolored 8-pack of Mr. Pen tailor's chalk on Amazon for just $5.95 (as of this writing).
Seam ripper
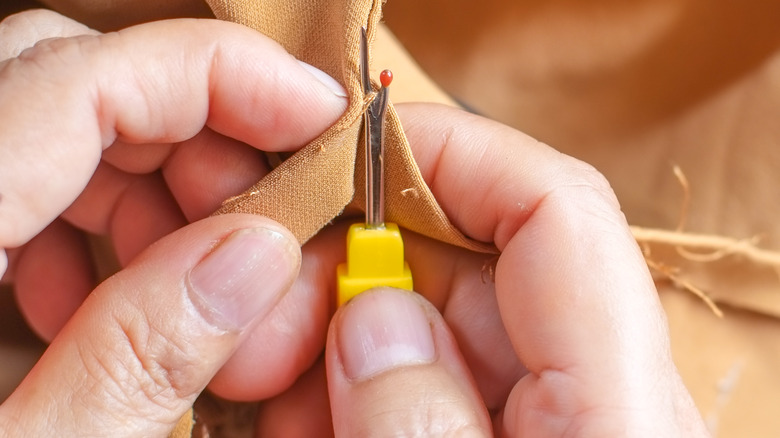
A seam ripper is the secret weapon of a good upcycler. This is the tool that can deconstruct a garment by removing the original seams, buttonholes, and other stitches without causing damage to the fabric. All you have to do is flip the piece inside out and run the seam ripper over any stitches you'd like to remove. You can use the same process to remove any stitches you added that didn't quite make the cut.
Removing each stich in a garment manually using small embroidery scissors or a razor blade takes much longer than using a seam ripper and is more likely to end in you accidentally cutting the fabric of your garment. If you're in a hurry to start pulling clothing items apart and mixing them together into your own beautifully upcycled Frankensteins of fashion, you don't have that kind of time to spare. Grab a seam ripper and get started on your new obsession.