A Beginner's Guide To Applying Eyeshadow
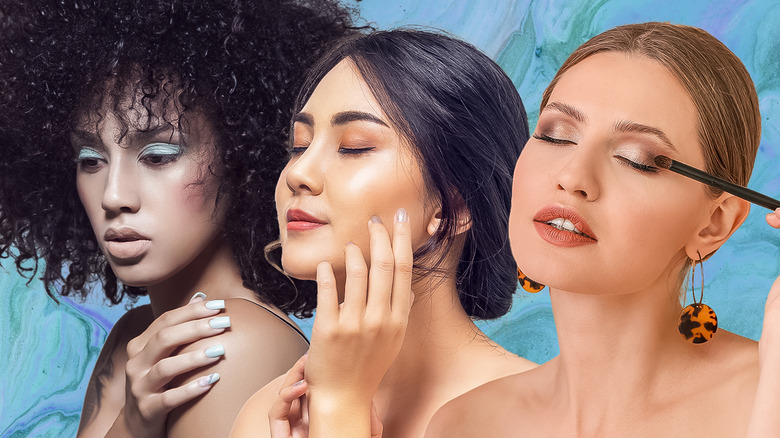
If you are someone who is just beginning to explore the magical world of makeup, eyeshadow can seem very intimidating. In fact, with so many color and texture choices, it's hard to know where to start. And that's not even taking into account all the options for brushes. We get it — it can seem overwhelming and complicated, but the truth is that eyeshadow is actually a super fun and creative part of the makeup journey, especially if you allow yourself to explore different looks.
If you're not sure where to start, we've got you. Questions like which brushes you need, how to ensure your eyeshadow lasts, and how your eye shape affects your eyeshadow are all important — and we're here to answer them. Keep in mind that makeup is very personal, and finding what you like when it comes to eyeshadow might take some time, but these tips are a great starting point!
Start with a clean canvas

Before we delve into the captivating world of eyeshadow application, it's crucial that we lay down the foundation for a flawless eye makeup look. Any good makeup artist will always tell you that makeup begins with a clean and well-prepared face. Begin by gently removing any traces of previous makeup from your eyelids. We recommend using a gentle makeup remover or micellar water to do this. Ensure that you're thorough but gentle to avoid irritating your delicate eye area. Next, cleanse your face using a mild and hydrating facial cleanser. Pay special attention to your eyelids, making sure to remove any remaining makeup or cleanser residue. A clean surface is essential for achieving the best eyeshadow application.
Once your eyelids are fresh and clean, it's time to moisturize. Apply a lightweight eye cream or facial moisturizer to your eyelids and the surrounding area. This step helps keep your eyelids hydrated and prevents any potential dry patches and flakiness. Avoid using heavy or oily products around your eyes, as they can cause your eyeshadow to crease and slide around. Also, avoid applying makeup too soon after moisturizing or using sunscreen— wait at least a couple of minutes. "Adding makeup too soon could dilute your sunscreen or interact with the ingredients, rendering them ineffective," dermatologist Dr. Kiran Mian reveals to Block Island Organics. By beginning your eyeshadow application journey with clean, well-moisturized skin, you'll ensure that your eye makeup not only looks great but also lasts as long as possible.
Figure out your eyelid shape
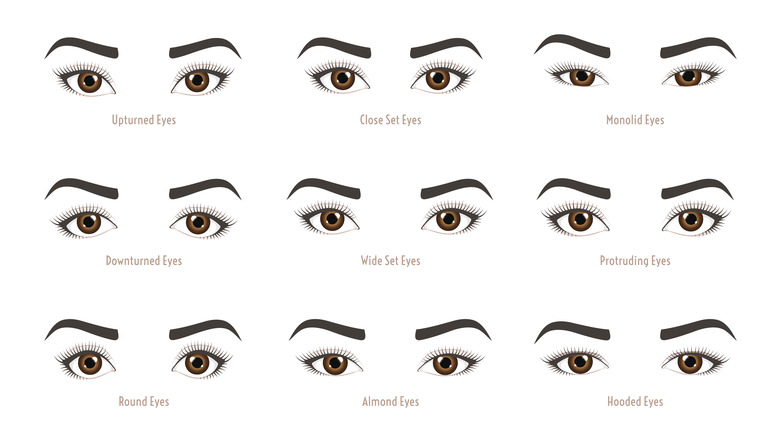
In order to get the most out of your eyeshadow and ensure the look you create is actually visible, it is crucial to understand your eye shape. Depending on whether you have almond, round, monolid, hooded, downturned, or upturned eyes, the eyeshadow effect you're trying to achieve will look completely different. If you're a beginner and following a video tutorial, we highly recommend following a tutorial done on someone who has your eye shape, as that will give you an idea of the results you can reasonably expect.
Now, there are multiple eye shapes, and sometimes, figuring out what eye shape you have isn't easy. You have monolids "if there is no crease to the lid and larger lid space below the brow bone," makeup artist Allie Renee explains to Ipsy. "If there is a crease, but it covers all or majority of the lid, this is a hooded eye," she adds. As far as deciding if your eyes are downturned or upturned, "pretend to draw a straight line across the eyes with the pupil in the middle," Renee advises. "Then look at the outer corners of your eyes to see whether they are pulling up above the line or down below the line."
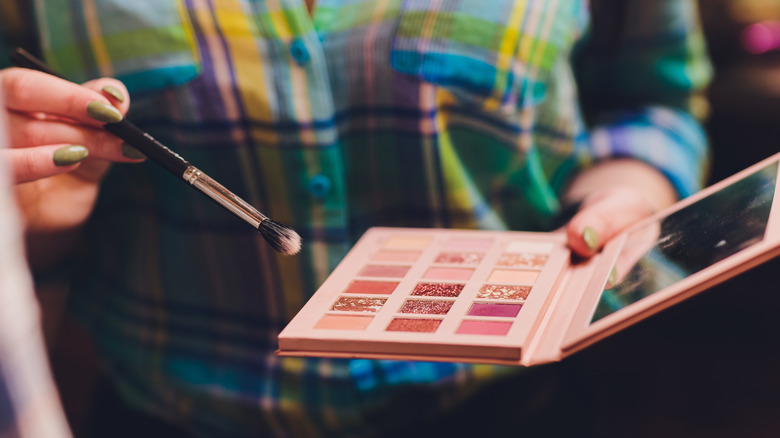
The different types of eyeshadow
As you embark on this makeup journey, you will quickly realize that there are different kinds of eyeshadows. The most common types are powder, cream, and liquid. Powder eyeshadow is "the OG of the eyeshadow world," celebrity makeup artist Michael D. Patterson tells Makeup.com. This kind of eyeshadow is great for beginners as it not only offers a variety of shades and finishes, but it's also the easiest one to blend and build up. For those seeking vibrant and long-lasting color, cream eyeshadow is the answer. "It's able to walk the line to be used as a base; it can create a quick office eye or a full-on glamazon look and even be used as an impromptu eyeliner," Patterson reveals. Lastly, liquid eyeshadow is an option we would recommend once you feel confident in your skills. "Liquids tend to spread very easily, so blend quickly with small amounts of product to achieve the desired intensity and placement before it dries," Patterson adds.
As far as finishes go, all three options come in a matte, satin, and glittery one. A matte finish has no shimmer or shine, and it is great for creating depth and contouring. A glittery finish has light-reflecting particles that draw attention to the area you apply the eyeshadow to. Satin eyeshadows strike a balance between matte and shimmer, and they give your eyelids a subtle glow.
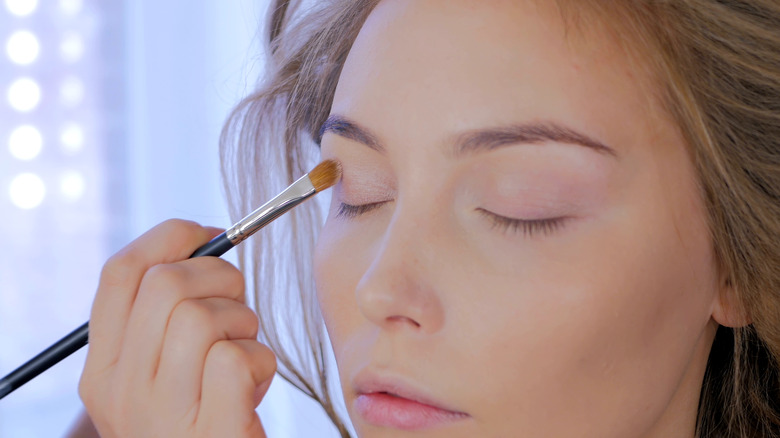
Make sure you have the right brushes
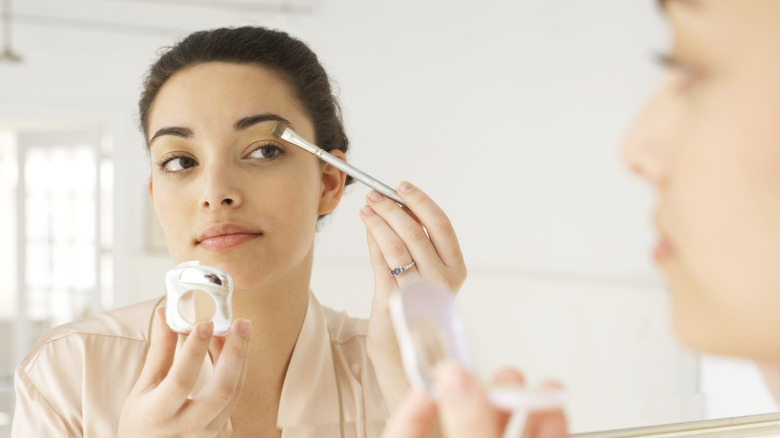
Today, there is a plethora of eye makeup brushes to choose from, which certainly makes picking the right one confusing, especially for beginners. "The best and most necessary eye makeup brushes are small eye-detailed brushes," celebrity makeup artist Janice Daoud reveals to Real Simple. Apart from a short brush that helps you precisely deposit eyeshadow onto the eyelid, having an angled and blending brush is also great for beginners. The angled brush can help you create a defined eyelash line without the use of eyeliner, while a blending brush is crucial for creating that soft transition between colors.
However, makeup rules are also meant to be broken, which is why if a certain brush works for a task it wasn't intended for, you can still totally use it. "When choosing your makeup brushes, always go with what feels good, followed by the application test," Daoud adds. "The application test will allow you to see how the color is picked up, deposited, and blended. If the bristles of the brushes do the job, then it's the right brush for you."
Apply eyeshadow before foundation

If you're just beginning your eyeshadow journey, chances are that fallout will be a common enemy of yours. Until you have perfected the art of application, we recommend doing your eye makeup first, followed by concealer and foundation. "I recommend doing eyes first because that way if there's any fallout from the eyeshadow, you can clean it up before starting the complexion without having to redo foundation and concealer," makeup artist Cara Lovello reveals to Real Simple.
Starting with your eyes has other advantages, too. By applying your eyeshadow before your base makeup, you can also easily address any mishaps or imperfections around your eyes without the hassle of redoing your entire face. And if you end up hating your eye look, you can simply remove the makeup and start all over again — something that isn't as easy when you've already applied your foundation and concealer.
Use a good eyeshadow primer
An eyeshadow primer is your secret weapon for enhancing the vibrancy and lasting power of your eye look, and it's a step you should never skip — especially if you're going for bold colors. "Primer aids in eyeshadow color opacity and staying power," makeup artist Tai Young tells Ipsy. "If you're going for a light wash of the color, it's not necessary."
Eye primer is there to smooth out your eyelids and create a perfect surface for shadow application. Primer is also your guarantee that the eyeshadow will stay in place all day and night. It can also intensify the color of your eyeshadow, making even the subtlest shades pop with brilliance. In fact, between a high-quality eyeshadow and a high-quality eye primer, we recommend investing in the latter, as it will simply make any eyeshadow better. Invest in a good eyeshadow primer, and your eye makeup will thank you with the performance it delivers.
Begin with neutral shades
While eyeshadow can be super expressive and fun, we recommend practicing the art with a neutral eyeshadow palette. When experimenting with eyeshadow — especially as a beginner — it's natural to make errors. Maybe a shade appears patchy, or blending doesn't go as planned. With a neutral palette, these mishaps are far less noticeable. The subtle hues help conceal imperfections, allowing you to build confidence in your technique.
To find a palette that suits your complexion, look for one that has a shade very similar to your skin tone, as well as one that is a couple of shades lighter and one a couple of shades darker. With these three shades, you can practice numerous makeup looks, and once you're ready, you can slowly incorporate colors. The beauty of starting with neutrals lies in their versatility — they serve as a foundation, which you can always come back to. Eventually, you'll be able to create a neutral eye look that suits your eye shape in a matter of minutes.
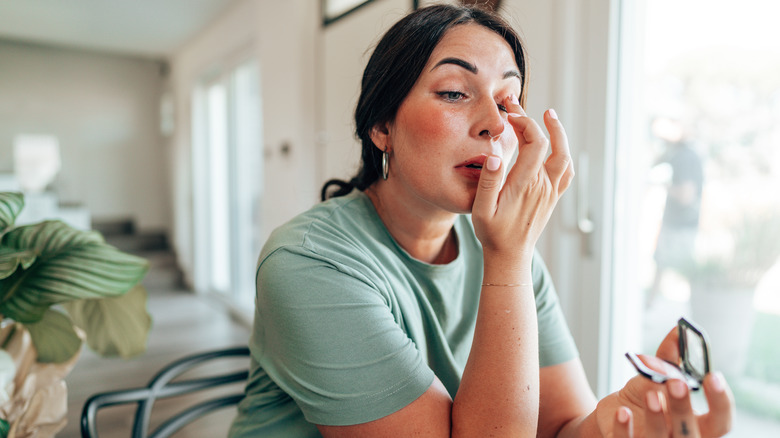
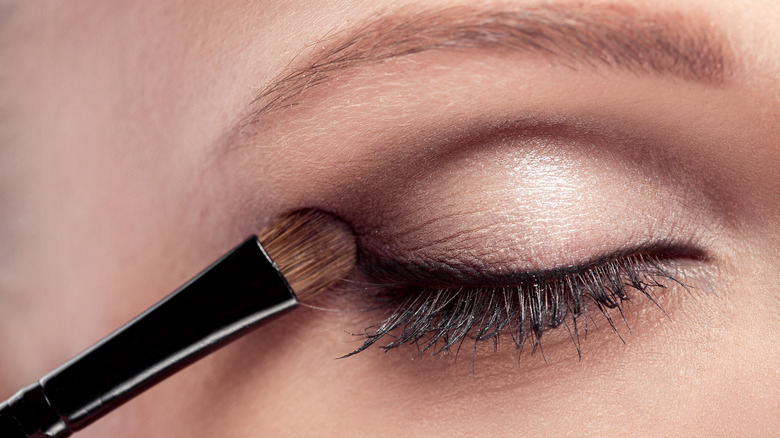
Apply a small amount and blend
With eyeshadow application, less is always more. Think of it this way — you can always intensify the look by going over an area again, but toning it down is harder. "It's always best to apply a small amount of product then blend and repeat until you have the desired effect, especially if you are a little heavy-handed," makeup artist Anna Lingis reveals to Glamour. "If you apply a dark shade and try to blend, it will make blending harder for you."
As mentioned, a blending brush is a crucial tool in your arsenal, and you will find yourself using it for every look. To ensure your eyeshadows are blended perfectly, keep your brush as clean as possible, and always blend in gentle, circular moves. "Marry as many colors together without being able to see where they start or stop," makeup artist Tai Young tells Ipsy. "Think of a watercolor painting and how each color flows into the next."
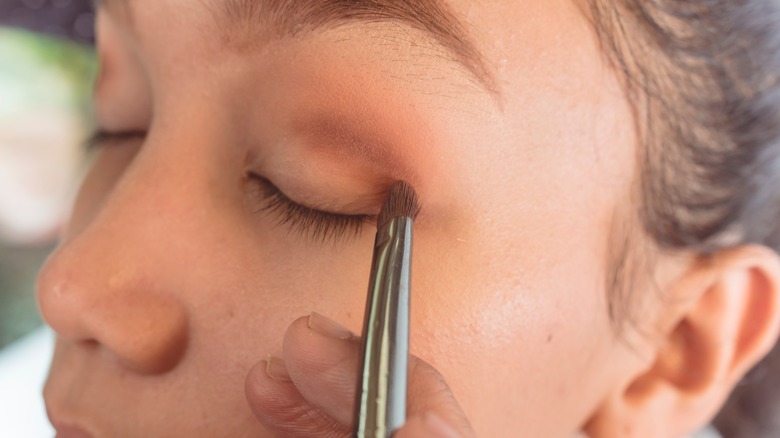
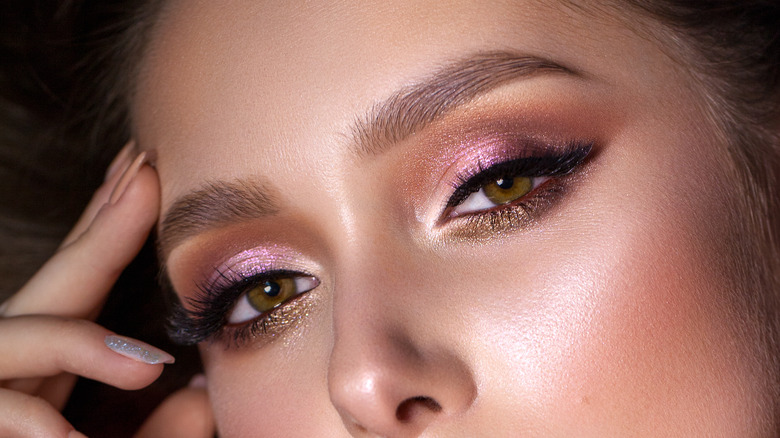
Optional: Define your crease
Defining your crease with eyeshadow is a common makeup look. However, it's important to adapt this technique to suit your individual eye shape. No matter what shape you have, if you want to define the crease, always start light and add more depth if necessary. "You can define your crease by going heavier with a color that's darker than what you used on your lid," makeup artist Tai Young tells Ipsy.
For those with a visible crease, all you have to do is apply a slightly darker eyeshadow to it to add dimension and drama to your eye makeup. For those with hooded eyelids, achieving the perfect crease can be a bit more challenging, but with practice, it's easily done. If you have hooded eyelids, you have to define the crease by creating the illusion of depth where there might not be a pronounced crease line. To achieve this, locate the area where your eyelid naturally folds when you look straight ahead. This is where you want to apply your crease color. It's typically a bit higher than the actual crease, allowing the color to peek through when your eyes are open.
Regardless of eye shape, remember: precision and blending are your best friends. Use a light touch and gradually intensify the crease color until you achieve the desired effect.
Optional: Dampen your brush for color intensity
If you're noticing that the colors of your eyeshadows look more vibrant in the palette and much paler on your skin, dampening them is a simple trick that can help bring out some of that intensity. "Dampen your brush and work the eyeshadow into a paste before applying," makeup artist Laura Shepherd tells Glamour. A pro tip is to also use a setting spray to dampen the eyeshadow, as this will not only intensify its color but make it last much longer, too. However, keep in mind that damp eyeshadow is a bit harder to blend out, so ensure you apply a little at a time and use a very precise brush for this step.
By dampening the eyeshadow, you're essentially unlocking its full potential. The moisture helps the eyeshadow adhere better to your skin, deepening its color payoff. The result? The bold, vibrant hues you fell in love with in the palette are now on your eyelids.
Optional: Apply eyeliner and mascara once you're done with eyeshadow
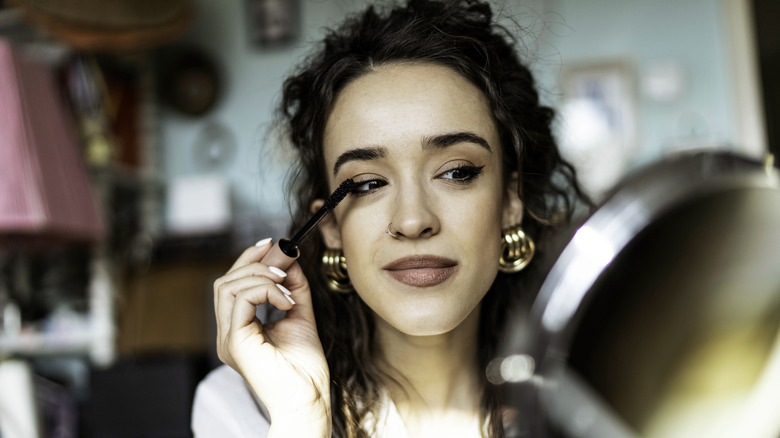
Most people tend to finish their eye look off by adding some eyeliner and mascara. Once you are satisfied with the way your eyeshadow looks, you can move on to these two steps. However, while they can take your eye look to the next level, remember — it's all about personal preference.
Some eyeshadow looks are cool enough to stand on their own, and frankly, eyeliner and mascara would only ruin the aesthetic. So, feel free to skip these steps if you're content with your eyeshadow as it is. Ultimately, makeup is a form of self-expression, and experimentation is key, so don't be afraid to try different combinations of eyeshadow, eyeliner, and mascara until you discover the look that makes you feel your best. Whether you choose to keep it simple or go all out, the world of eye makeup is yours to explore and enjoy.
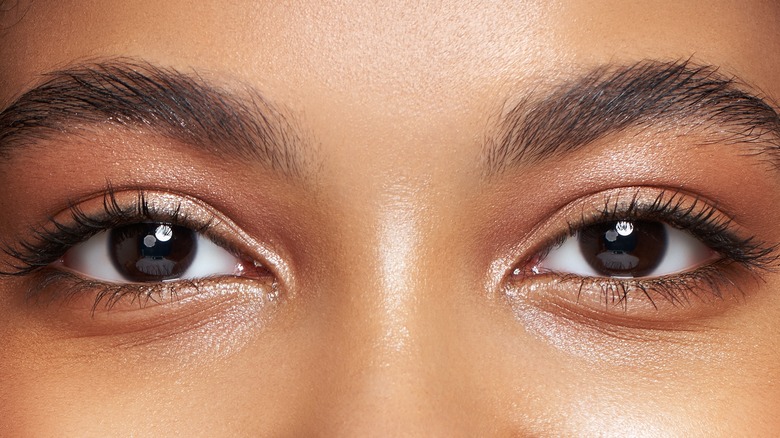
Optional: Make your eyes pop by highlighting
Highlighting your eyes is an easy and quick way to make them appear bigger and more wide awake. "A highlight under the brow is nice to pop the brows from the eyeshadow," makeup artist Tai Young tells Ipsy. In fact, adding a bit of highlighter under your eyebrow can change your look entirely, as it creates a natural glow that enhances your eye look even more. "Some people even place a little highlight in the inner corners to wake up a tired eye," Young adds. This brightens up the area and can instantly make tired eyes appear more refreshed. It's a quick fix for those mornings when you need to look a tad more awake.
For highlighting, you can use a light eyeshadow or the highlighter you use on your face — both work! If you want the highlight to seem more natural, you'll go for a highlighter with a pearlescent-like sheen to give you that "my skin is simply glowing" look. Having visible glitter particles will make it look more like eyeshadow, which is totally fine, too. It's all about which look you're going for!
Set with a setting spray
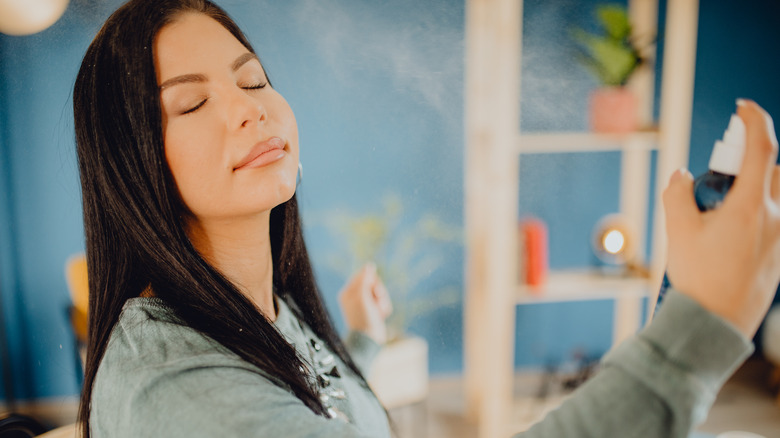
The final step in your eyeshadow journey is setting spray. After all, you want to prevent smudging and creasing as much as possible, and setting spray is your best bet. This final touch can make a significant difference in how long your eyeshadow stays put and how vibrant it remains throughout the day or night.
Here's a pro tip: Consider a two-step approach to setting spray — once when you finish your eyeshadow look and a second time when you're done with your entire face. This way, you'll make sure nothing moves while you're working on the rest of your makeup. Of course, this is assuming that you have done your eyeshadow first. Remember that setting spray is a makeup artist's secret weapon for long-lasting, flawless eye makeup. "I love using a setting spray over makeup to combat dryness and add longevity," celebrity makeup artist Nydia Figueroa admits to Byrdie. So, don't skip this crucial step if you want your eyeshadow to look flawless from dawn to dusk.
Have fun with eyeshadow

Here's the most crucial tip of all when it comes to applying eyeshadow: Have fun with it! Makeup is a form of personal expression, which means that all of the rules you come across (including the ones we've mentioned here) shouldn't be taken too seriously. While we've shared some valuable guidelines to help you begin your eyeshadow journey, remember that makeup is ultimately a reflection of your unique style and personality. Don't treat these tips as rigid instructions, and feel free to totally challenge everything we've mentioned.
The best way to learn how to do eyeshadow is to simply experiment with different colors, brushes, and styles. This will help you figure out what you like — and that is the only thing that matters. And if you realize that eyeshadow isn't your thing, that's totally fine, too. Makeup has so much more to offer, and there is no rule that says you have to love every aspect of it!