Our Best DIY Tips For Fraying Jean Shorts At Home

We may receive a commission on purchases made from links.
A solid pair of go-to denim shorts is a timeless staple in just about any summer wardrobe, but, despite the popularity of this item, it seems nearly impossible to find an option that fits. Shorts tend to ride up, look too short or too long, or gape at the back, leaving you to either accept the discomfort or find yourself stuck in a months-long loop of purchases and returns to track down the perfect pair.
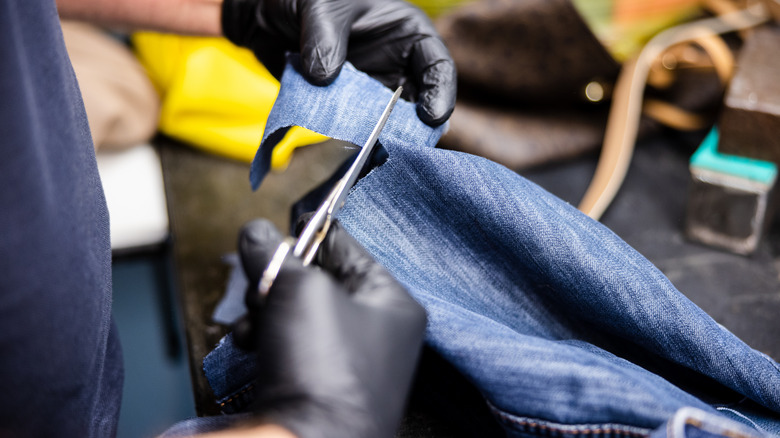
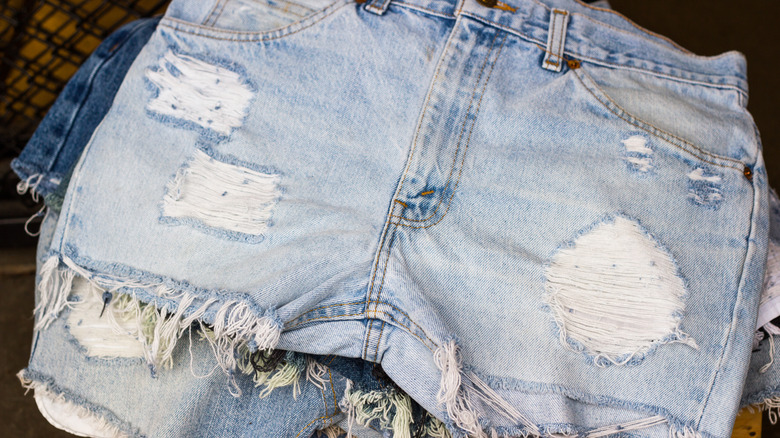
Luckily, however, cutoff denim shorts are one of the easiest things to make yourself, no sewing or extra materials necessary. Well-fitting jeans are much easier to find at thrift stores — and hiding in the back of your closet — so, with a few snips of the scissors, you can transform extra denim you have lying around into a pair of shorts you'll enjoy rocking all summer long. After your initial trim, however, you might find yourself less-than-impressed with the raw, straight finish at the hem. Thankfully, creating the perfectly distressed edge is a fairly simple process, too. After learning a few tips, you'll be able to create a well-fitting pair of shorts that look more like something you pulled from the rack than a DIY project gone wrong.
Cut slightly longer than you'd expect
By far the most important part of fraying your denim shorts is finding the ideal point at which to cut for that distressed hem look. The thing to remember is fraying the edges of your denim shorts won't take them from chinos to Daisy Dukes, but it can knock off a bit of length. For a longer pair of shorts, this isn't much of a concern, but, if you're trying to toe the line between beachy and cheek-baring-short shorts, an inch or two makes all the difference.
Because of this, if you have the option, trim your shorts to a slightly longer inseam than you want out of your final product — usually, about an inch does the job. This way, if you want to take off more length, you can always go back in for an additional trim after distressing, but you won't be left with something that you feel uncomfortable wearing out and about.
Use tweezers for a more precise look
To understand the process of distressing your jean shorts, you need to learn a bit about the structure of denim itself. Denim is a woven fabric, that, in most cases, utilizes two colors of thread — blue and white. The white thread runs one way and the blue thread runs the other, creating the classic darker exterior and lighter interior we're used to seeing in our jeans (via MasterClass).
Because of this, if you pull out or trim threads from both colors, you're left with a plain hole. If you stick to all white or all blue, however, you get the classic frayed look. Doing this by hand is a bit tedious, but if you want precise areas and length of fray, you might need to go in with a pair of tweezers to remove certain threads. For a frayed hem, you're going to want to pull the threads that run horizontally, but if you want to create patches of distressing around the rest of the shorts, you can also trim back and remove a few vertical threads to create spots that reveal a bit of the pocket underneath.
Try out a nail file

One of the easiest tools to rough up denim might be found in an unexpected place — your beauty cabinet. Denim is an incredibly tough material, so, if you want to create the look and feel of distressing without wearing it for several years, you have to create it artificially. That's where the nail file comes in. If your desired look includes natural-looking holes or more intense fraying at the hem, a bit of rubbing with a nail file can get the job done quickly.
This works because a nail file is essentially sandpaper, and the powerful grit can help weaken or fully tear through the individual cotton threads that denim is made of. A larger piece of sandpaper works in a pinch, but a nail file is a bit more accessible and the perfect size to maneuver if you want to keep your distressing precise and avoid compromising the fabric with too many holes.
Utilize friction

If you're not planning to create any holes and your desired look is just a more natural-looking hem, all you need are the shorts themselves. Grab opposite ends of the leg opening and repeatedly rub them together. It might seem a bit silly at first, but this motion and the friction it creates will help pull out a few of the threads at the bottom of the fabric and encourage them to bunch together, leaving you with less of a just-cut look.
Compared to the other options for fraying the edges of your shorts, this is by far the quickest and easiest, but it also doesn't create the most impactful result. This is best if you're in a pinch and want to wear your shorts right away. They'll continue to create a more natural fray as you wear and wash them over time, but this is a simple method to get that process started without much fuss.
Throw them in the wash
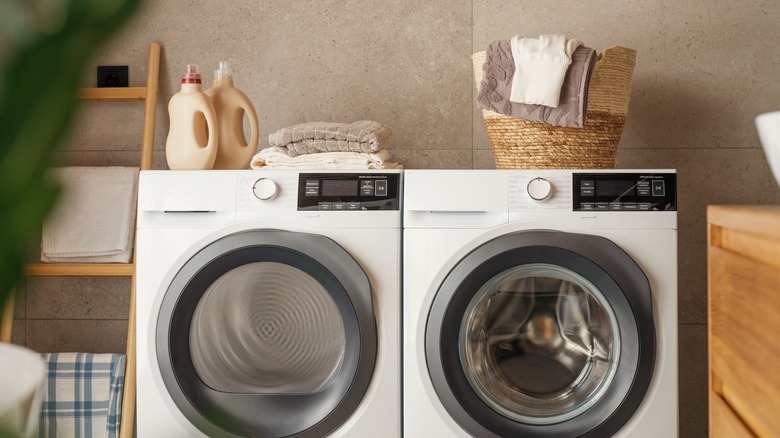
The final method to help distress the hem of your denim shorts is likely something you plan to do anyway — washing them, per MasterClass. Unless you want more control over the process or don't have the time to wait for a full wash and dry cycle, it's likely that all you really need to do to finish off your freshly-cut denim is throw it in the washing machine. The friction and agitation from being thrown around against the other clothes will cause the threads to loosen and bunch up along the hem, nicely finishing them off without any additional work on your part.
With that being said, however, these other methods are great to have on deck if you have a specific look in mind, and, if you ever feel that your handiwork looks a bit too precise to feel natural, a load of laundry will likely be your saving grace. Whichever method you choose, cutting and fraying your own shorts is significantly easier than most people expect, and can save you plenty of time and money on your hunt for the perfect piece to finish off your summer wardrobe.