How To Avoid & Fix Even The Worst Contour Mistakes

Contouring is one of the most potent weapons in our beauty arsenal. Chiseled jawline, defined cheeks, high brows, button nose, enhanced collarbone — there is nothing that a little bit of shading and highlighting cannot do. From drab to fab, with the stroke of some carefully applied makeup, glam is the way to be.
However, as much as we like to credit influencers and celebrities like Kim Kardashian for introducing the world to contouring by revolutionizing the technique, the magic of this method existed long before. It dates back to early Elizabethan times, when stage actors would apply soot and chalk on the faces to accentuate facial expressions, visible to audiences sitting further in the back. The trend stood the test of time, and actors such as Vivien Leigh accentuated their features in Old Hollywood movies. Famous makeup artist Max Factor began applying contouring makeup for stage actors, and in 1945, he released a tutorial on how to contour different face shapes.
The makeup technique's rich history aside, in recent years, contouring has found its way into our homes and straight to our hearts thanks to the social media frenzy and viral TikTok hacks (thank you, JLo, for the contouring lessons!). As more and more related products find their way into the mainstream beauty landscape — and by default, in our makeup bags — are you guilty of making these common contour mistakes? And if you are, is there any way to salvage the situation?
Avoid using shades too dark for your skin
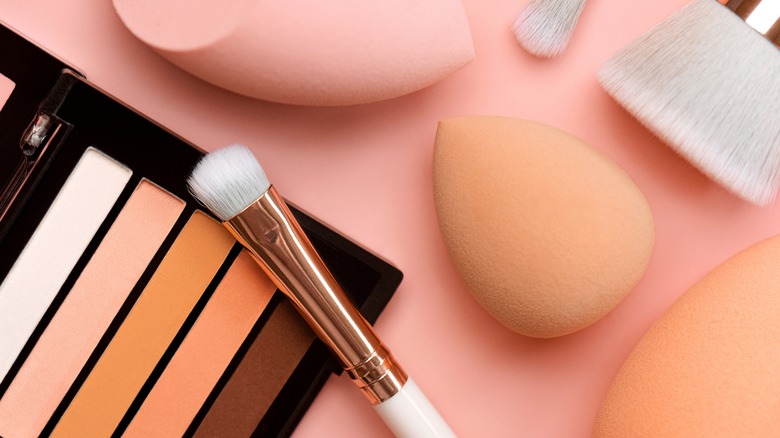
One of the worst mistakes you can make is sculpting your face with a shade that is too dark for your skin color. Ideally, you want to go with a product that is only one or two shades darker than your natural tone; otherwise, you run the risk of looking unnaturally made-up.
First, find your undertone to determine whether you should opt for cooler or warmer shades. A quick way to find out your undertone is by looking at the color of the veins in your inner wrist in natural light. If your veins appear to be green, your skin has warmer undertones. On the other hand, if they appear to be blue or purple, you have cool undertones, and if you have a mixture of both, you have neutral undertones.
Warmer undertones on tan and olive complexions require more golden hues that complement your skin's natural color. Cool undertones on fair-to-medium complexions perfectly match with neutral taupe. For neutral undertones, you can opt for neutral shades that find the right balance between blue and red hues, going as dark or as light as your skin requires.
Avoid going overboard with your highlighter
Much like your contouring, choosing the right highlighter tones is paramount. A good tip is to use a shimmering highlighter tone that gently blends in with your natural skin color instead of one that starkly stands out and appears fake. Medium to dark skin colors match with peachy gold and alluring bronze shades, whereas fairer skin needs more translucent ivory shades. However, even when you manage to strike the perfect balance between skin color and optimal highlighter, you may still fall into the "more is best" trap.
Unfortunately, going overboard with your highlighter can ruin all your painstaking contouring efforts by giving your face a frosted look instead of a shimmering glow. Moreover, too much highlighter will make your face appear wider. Bear in mind that highlighter is used to accentuate your cheekbones and cupid's bow, and to slim the nose. Applying too much highlighter on your whole face will not give you the desired effect, as it will look flat, losing the contrasting result you are trying to achieve.
There are two ways you can apply highlighter. You can either map out your face with both highlighter and contour simultaneously and then blend them together using a sponge or brush. Alternatively, you can apply highlighter first (bridge of the nose, under the eyes, between the brows, and on the chin and décolletage), blend it, and then contour. While highlighter and contour are complete opposites, you still need them both!
Avoid using a bronzer to contour

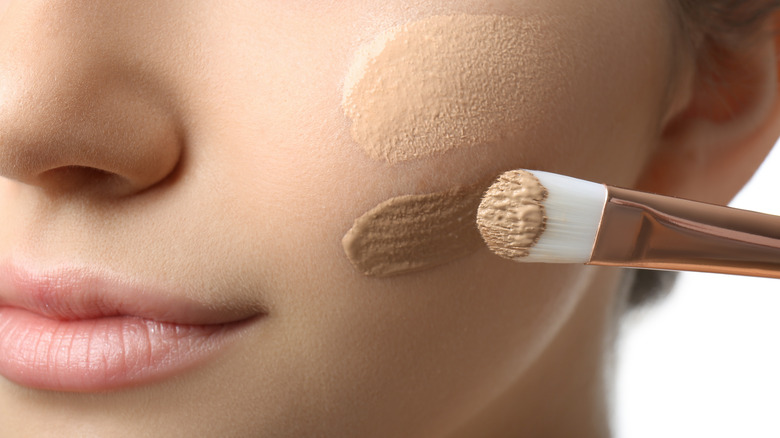
Bronzer and contour have been commonly confused and, unfortunately, sometimes used interchangeably. Both products are a couple shades darker than your skin and are applied using a brush. Pretty much the same, right? Well, not really. As much as they look the same, bronzer and contour are not the same products and are not intended for the same use.
A bronzer is used to add a touch of glowing warmth to your skin, much like the color you get after tanning. On the other hand, contour is used to accentuate your face's natural lines and give a more sculpted dimension to your cheekbones, nose, chin, and forehead. Accordingly, bronzer items are formulated to give the complexion a gentle glow, enhancing its warmth and luminosity. Conversely, contouring products lack the glistening appeal and usually consist of neutral hues, providing a matte finish instead.
Since bronzers are made to emulate the effects of a sun-kissed look, they are applied on parts of the face that would naturally receive more sunlight. As such, bronzer is applied on high points like cheekbones and the tip of the nose. On the contrary, contour seeks to enhance the naturally concave parts of your face by creating more dramatic shadows, leading to a more chiseled effect. Unlike bronzer, contour should be applied under the cheekbones, under the jawline, on either side of the nose, and along your temples.
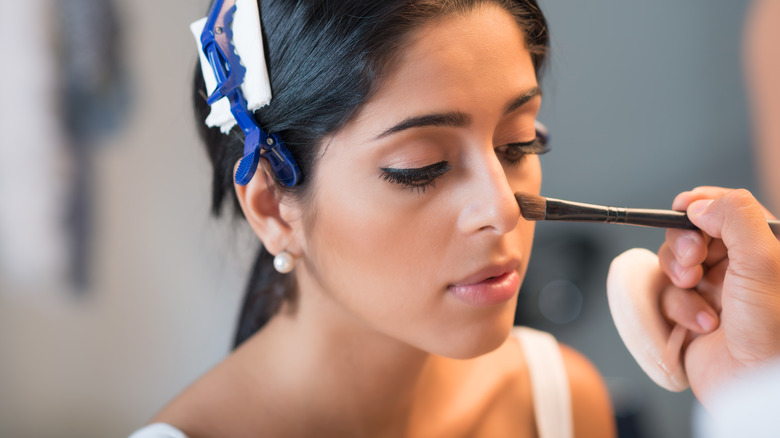
Fix contour that's too low under your cheekbone
It is easy to make the rookie mistake of contouring too low under your cheekbone. Going too low with the contour will have the opposite effect of what you are looking for. Instead of lifting your face, it adds a more droopy look to it. However, this is an easy fix, and thankfully, it does not require you to start all over again.
Simply wrap a makeup wipe around your finger, and gently trace the line right below your cheekbone. When relying on visual cues alone, we tend to assume the cheekline is lower than it actually is, hence the extended contouring toward our jawline. However, using your finger and actually tracing the line shows the exact point where your contouring should be to accentuate the face's natural shadows. Once you have wiped the excess contouring, use a makeup refreshing spray to make it easier to fix your look, and you can contour again, getting it right this time.
With a dense, fluffy brush, use upward strokes to blend the now–refined contour line. Next, use a swirling and buffing motion to blend the contour on your cheekbones and forehead, making sure you blend it well into the hairline for that seamless, natural look. Complete the fixing process by using a contour stick to add subtle shadows in the hollow of the cheek. You may also use blush contouring for perfectly rosy cheeks.
Fix the widening shadow on the side of your nose
When it comes to contouring our nose, many people follow this basic principle: darken the entire sides of the nose and highlight the center part. Quite straightforward, right? No, not really. Instead of making your nose look slimmer, this technique actually makes it look wider! It sounds counterintuitive, but basic Art 101 teaches us that wider objects (or noses) cast longer and bigger shadows. So if you use your contouring stick to create thick dark lines on the side of your nose all the way to your nostrils, you will end up with a nose that looks even wider.
Luckily, this too is an easy fix. Using a makeup wipe, remove the thick shadow you've created. This time, instead of using the contour on the side of the nose, go slightly inward and upward, and create a thin line at the edges of your nose bridge. Using a brush, apply soft circular motions to blend the contour. Finally, use a highlighter at the tip of your nose to accentuate the shadow lines, giving your nose a slimmer look for that sexy appeal.
Still confused? It's okay. This tricky technique takes time to perfect, which is why a beginner's guide to face contouring is very handy!
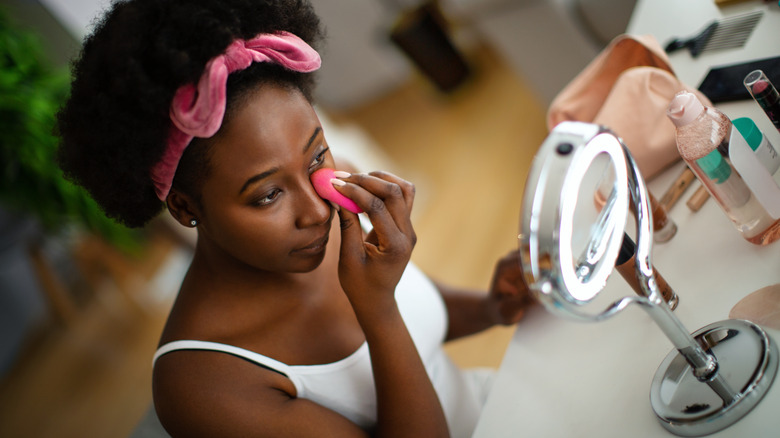
Fix patchy-looking contour

There are a number of reasons your contour might end up looking patchy. First, for flawless makeup, you need a foundation that perfectly sets on your skin, creating the optimal canvas to work your contouring and highlighting magic. If your foundation does not set and is still moist, your contour will end up looking patchy and muddy. Similarly, applying too much contour using a mixture of powder and cream ingredients will result in a flaky, patchy finish. Using the wrong tools will not enable you to blend properly, thus leading to a less-than-optimal finish.
No matter the real culprit behind your patchy, unnatural contour, there are ways to fix the look without having to wipe everything clean and start again. The first thing you need to do is remove any excess product and residual oil from your skin. A cotton round or a makeup blotting paper will work. Next, create a smooth base over your existing contour by adding a very light layer of powder. Then use a fluffy angled brush to swirl the powder and seamlessly blend it with the contour.
Check where you need to fix your contour and gently reapply with a stick, adding little contour dots as needed. Again, blend with small circular motions to avoid patchy effects. Finally, finish by applying a setting spray to bring everything together for a natural, polished appearance. Congrats, contour pro!